This guide is meant as a precursor to applying acoustic treatment to your studio. It will allow you to minimize and control acoustic problems, making the application of acoustic treatment easier and potentially more affordable. There’s plenty you can do to improve room acoustics without acoustic treatment, and without spending any money. The position of your speakers and your desk, in relation to your room, have a tremendous impact on the way you perceive sound.
Why bother with tackling room acoustics at all? Sound produced by speakers, in an untreated room, can interact with the space in a way that causes you to make uninformed mixing and mastering decisions. Controlling the way sound interacts with your studio can minimize acoustic problems, and allow you to effectively create songs that consistently translate well to other playback systems.
To make use of your room, along with your speakers, you need to get the acoustics of your room to a level that produces a sound quality equal to, or better than, that of your studio headphones.
A lot of people have been told that working with speakers is better than using headphones, and for various reasons... but there's a deal breaking point that tends to get omitted from this statement far too often. If you're working in a studio that hasn't been treated correctly (and not just by slapping some acoustic foam on the walls), then your mixing environment can do more harm than good.
For example, if your room is boosting your low-end 12 dB around 44 Hz at your listening position, that's a huge problem; you'll likely end up mixing your basslines too quietly. In this case, working with headphones, and software like Sonarworks' Reference 4, can be much more beneficial than using speakers in a sub-par room. Headphones take your problematic room out of the equation, while introducing their own, potentially less damaging issues.
The benefit of working in a properly sound treated studio is that you can avoid the issues inherent of headphones, while not having to worry about acoustic problems being introduced by your room. In this situation, working with speakers may very well be "better" than working with headphones. Although, getting the acoustics of your studio to this points takes time, acoustic treatment, and room calibration software. I'll be showing you how to take the first step in this process by arranging your studio in a way that minimizes acoustic problems and prepares your room for the application of acoustic treatment.
As a disclaimer, this guide assumes that you already have some essential studio equipment like a chair, desk, speaker stands, and speakers.
Where to Place Your Desk
The main components that most home studios include are a high-quality office chair, music production desk, and a pair of studio monitors; there are some cardinal sins that you’ll want to avoid when setting up this equipment to prevent acoustic problems.
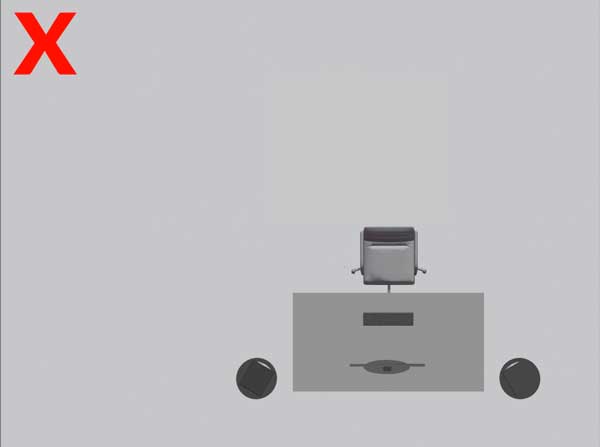
Placing your battle station in the corner of your room is a surefire way to guarantee bass buildup. Bass gathers in the corner of rooms due to room modes, and the result is that you may end up mixing songs that are bass deficient. If your bassline sounds too loud on your studio monitors, your natural inclination will be to turn the bass down in the mix. When you play the song on a different system, you’ll realize your bassline is too quiet. Stay away from corners at all costs.

With the corners of your room out of the equation, you’re left facing your desk towards either the short wall or the long wall in your room. Symmetry is something that you’ll want to take into consideration here as well. Placing your desk and monitors closer to one wall than the other means that the sound waves propagating throughout your room will be interacting with it asymmetrically, making it much harder to predict and control acoustic problems.
Facing the long wall in your room isn’t necessarily the best idea either because you aren’t taking advantage of the room’s full length in the most efficient way possible. Room modes, which are the build-up of resonant frequencies in your room, can be overcome by moving your station closer to, or further away from the wall you’re facing. The more space you have to move forward and backward, the easier it will be to deal with room modes.
Treating low-end resonance with acoustic panels can be difficult, so it’s best to minimize bass resonance by positioning your set up appropriately. Moving your listening position forward or backward in your room can help you avoid an area with too much bass or too little bass. Rather than trying to deal with resonance using acoustic treatment, you can try to avoid it all together.
Facing the room’s short wall will give you the most flexibility to move your set up forward and backward as needed, in an attempt to avoid placing yourself in a spot that lacks bass or has too much bass. Unless you’re working in a very large space, you should avoid facing the long wall of your studio.

Room modes tend to pile up in the center of rooms, so placing your listening position here can be problematic as well. As mentioned, this may cause you to make poor mixing decisions when it comes to the low-end of the music you’re working on.

There’s a rule known as “the 38% rule” that theorizes that setting up your listening position 38% away from the wall you’re facing is a going to provide the best compromise of peaks (antinodes) and nulls (nodes). This is more of a recommendation than an actual rule because every room is unique, but it’s a good starting point.

The best ways to determine the optimal listening position in your room involves using room calibration software like Room EQ Wizard along with a calibration microphone. Setting up your room correctly can be a rather time-consuming process, but the results are worth it.
Your goal should be to achieve a near-flat frequency response at your listening position; this is the type of information that Room EQ Wizard or Sonarworks Reference 4 will allow you to view. When you start applying acoustic treatment, you’ll be able to optimize the frequency response of your room further, and effectively deal with acoustic problems like comb filtering, flutter echo, standing waves, and excessive reverberation.
Setting Speaker Height Correctly
Setting up your speakers at the appropriate height and angle can make a big difference in how effective they are. It takes just a few minutes to get speaker placement right, and the payoff is enormous.
I recommend picking up some height-adjustable speaker stands if you don’t already have them. This will allow you to position the acoustical axis of the speakers in line with your ears. There’s this misconception that you’re meant to align the main driver of each speaker with the height of your ears, but the acoustical axis is actually the center point between your speaker’s tweeter and main driver.


By aligning the height of your ears with the acoustical axis of your speakers, you ensure that the wavefronts produced by both the tweeter and the main driver reach your ears at the same time; this can help to avoid phase distortion.
Let’s take a look at what would happen if you placed the tweeter 100 feet away from your listening position, and set the main driver 1 foot away. You would be able to hear a time delay between when the bass reaches your ears (almost immediately), versus when the high-frequency content reaches your ears (significantly delayed).
Aligning your speaker’s acoustical axis with your ear ensures that each driver (the tweeter and main driver) is equidistant from your ear, effectively avoiding any sort of time delay and various issues associated with that.


What about placing your speakers on their side? It looks sleek and I'm sure you've seen it done before. In Hugh Robinson's article "Q. Can my monitors go on their sides?" via Sound On Sound, he states that "There are several technical reasons why turning monitor speakers on their sides isn't generally a good idea, although some speakers are designed to be usable in this way (usually involving turning the tweeter waveguide around, and various other tweaks). The primary aspect is the stereo imaging, as you say. Conventionally, the tweeter and bass driver are aligned vertically so that the sounds from each arrive at the listener at the same time. Turning the speaker on its side will result in sounds from the two drivers arriving at different times. This usually results in a strange, unstable and disconnected stereo image, where the different frequency components of a specific sound source will appear to come from a different place. Generally, you won't be able to reproduce a stable centre phantom image with the speakers configured in this way."
In this article, Sweetwater explains that "In most cases, the HF driver is designed to spread sound wider left/right (in the horizontal plane) than up/down (in the vertical plane); this is to create a wider sweet spot. When you turn a vertical monitor on its side, for example, the width of the sweet spot narrows and the tweeter throws more sound up toward the ceiling and down toward the floor. This may or may not cause acoustical anomalies. If the monitors are active, with cooling heat sinks on the back, you may also impact proper airflow for adequate cooling."
Setting Speaker Angle Correctly
The distance your speakers are from your listening position doesn’t matter quite as much as the angle they’re positioned at relative to where you’re sitting. You’re meant to form an equilateral triangle between a point at the back of your head and the acoustical axis of each speaker.
To set up the angle of your speakers effectively, measure the distance between the acoustical axis of your speakers, and match that distance with the distance between each speaker’s acoustical axis and the back of your head. Regardless of how far away the speakers are from where you’re sitting, this will ensure that each speaker is angled 30 degrees off axis from the direction you’re facing, which is precisely what you want. This configuration will allow you to perceive stereo information accurately.

Choosing an Appropriate Speaker Size
Bigger speakers aren’t necessarily always better. How your speakers interact with the environment around them is known as speaker boundary interference response. The smaller your room, the more of an interference response you’re going to get.
Larger monitors will interact more heavily with the environment they’re in and can potentially cause more of an interference response than a pair of smaller monitors. Certain speakers like the Kali Audio LP-6s and LP-8s allow you to accommodate for interference response with a boundary compensation EQ.
As you may have noticed, the speakers in Figure 10 have been pushed close to the wall to create an equilateral triangle. Before you start screaming “bloody murder” because you’ve heard you shouldn’t place speakers close to the wall of your studio, you need to take the room’s size into consideration. In larger rooms, moving the speakers away from the wall can reduce interference response, but in smaller rooms, you may not have the space to push them further away from the wall.
Placing speakers closer to the wall of a small studio can help move low-end resonance up to the 300-400 Hz range. It’s going to be a lot easier and cheaper to treat resonance at 300-400 Hz as opposed to 20-100 Hz; the reason for this is that you require extremely dense material to handle resonant sub frequencies effectively. In this situation, you’re basically picking the lesser of two evils.
If you're working with a subwoofer it's incredibly important that you've integrated it with your room properly. Check out "How to Set Up a Studio Subwoofer" to ensure that your subwoofer is helping and not harming your listening environment.
The cracks in the glorious 38% rule are probably becoming much more apparent now. Variables like speaker placement and room size need to be taken into consideration, so placing your listening position a set distance away from the front wall of your studio won’t guarantee an optimal frequency response at your listening position. You should be using this guide as a starting point, and ironing out the problems you come across through the use of room calibration software, and eventually, acoustic treatment.
Alternative Studio Designs
This guide covers just one potential studio design, which also seems to be one of the most practical and affordable for most home studios. There are multiple approaches to studio design that you can take, so if you hear someone mention an alternative approach, you shouldn't immediately write them off.
For example, a reflection-free control room design has the speakers built into the wall and angled down towards the engineer to create a large reflection-free zone. This design requires construction, so if you live in an apartment it’s probably not possible to make use of it. My point is that you should keep an open mind when it comes to studio designs, and take various factors into consideration when choosing the design that works best for you.
Once you’ve done all that you can to improve your listening environment by rearranging the position of your studio gear, you can move on to applying acoustic treatment. It’s essential that you set yourself up for success by addressing acoustic problems at a fundamental level, rather than trying to treat problems you’ve created for yourself later on. If you’ve applied the concepts in this guide to your studio set up, you should now be working with a much more acoustically refined space.
Learn what makes a good studio monitor, how studio monitors work, and how to choose the right studio monitors by reading our Studio Monitor Buyer's Guide.