A vocoder allows you to reshape the harmonic structure of a sound so that it sounds similar to another sound. The classic talking robot vocoder effect is created by providing a synth with the harmonic structure of vocals.
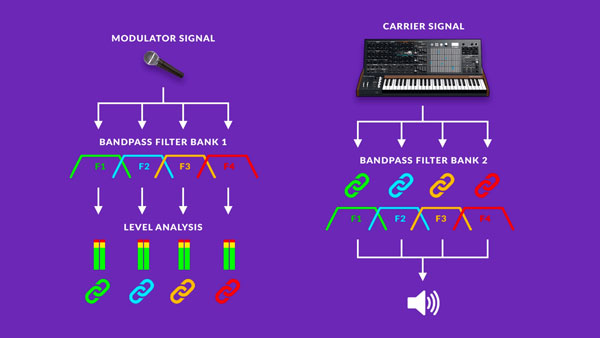
Vocoders require two types of signals to function properly. They need a modulator signal, which is typically a vocal, and they need a carrier signal, which is typically a synth.
The modulator signal runs through a series of bandpass filters that split the signal into different frequency ranges. Each band then has its signal level analyzed by a level analysis meter.
The carrier signal runs through a different series of bandpass filters, but the level of each of these filters is linked to one of the previously mentioned analysis meters.
While the exact harmonic structure of the modulator isn't captured, a general representation of it is. Using more bandpass filters will cause your carrier signal to sound more like the modulator signal—this can result in a synth that sounds like it’s talking or singing.
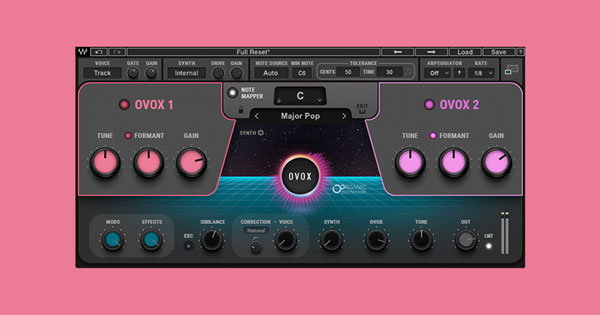
For demonstration purposes, I'll be using Waves’ OVox. I think it sounds awesome, it’s really easy to operate, and it has a ton of cool features, but the same concepts apply regardless of the vocoder you're using. If you want to download the OVox demo to follow along with this video I’ve included a link to the plugin.
1. Create an Audio Track for Your Modulator Signal
You need to create an audio track for your modulator signal, which in this case is going to be a vocal recording. You can create an audio track by pressing [CMD][T] in Ableton and then dropping a vocal recording onto the track.
2. Add OVox to The Track With The Modulator Signal
Insert OVox onto the track containing the vocal. By default, you won’t be able to control OVox using your MIDI keyboard, so some additional setup is required.
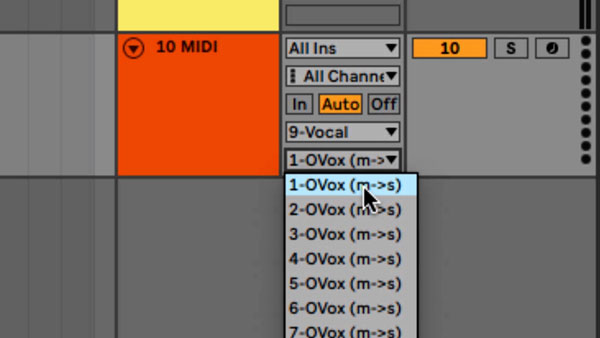
3. Create a MIDI Track
OVox has a synth built into it that you can use as the carrier signal, but you need to route a MIDI signal into OVox to take control of the synth. Create a MIDI track in Ableton by pressing [CMD][Shift][T]. Route the MIDI signal into OVox by selecting your vocal track as the Output Type, and OVox as the Output Channel.
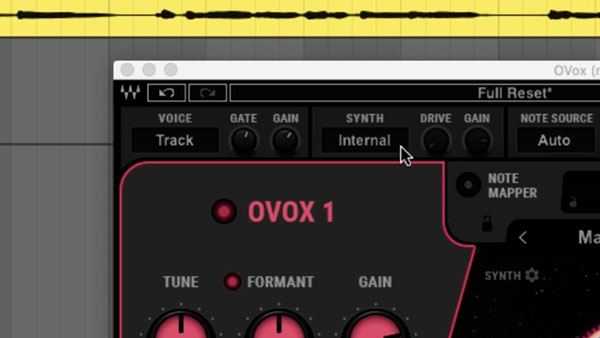
Open up OVox and make sure that the Voice setting is set to Track and the Synth setting is set to Internal. This set up uses the track you’ve applied OVox to as the modulator, and OVox’s built-in synth as the carrier.
4. Play MIDI notes
Now, when you record arm your MIDI track, engage playback, and play notes on your MIDI keyboard, you’ll be in control of OVox.
When you play a C on your keyboard, it will sound like the synth built into OVox is singing a C using the phrases from the vocal recording. You can also build chords using this technique so it’s a cool way to generate harmonies.
Keep in mind that when there’s no audio playing through your vocal track, playing MIDI notes will not result in sound. The carrier signal, which is the synth, is adopting the harmonic profile of the vocals so when the vocals aren’t playing, neither will the synth.


If you wanted to use an external synth like Serum, you could drop the synth onto your MIDI track, set the MIDI tracks’ Output Type to your vocal track, and select OVox’s side chain input as the Output Channel. Then, within OVox, you’d need to change the Synth setting to side chain mode
Instead of OVox using its internal synth as the carrier, it will now make use of your third-party synth instead. Pads and buzzy saws tend you get run through vocoders quite often, but you can also achieve crazy results using bass growls and other sounds as the carrier signal.
5. Refine The Vocoder's Settings
So, that’s how you set up a vocoder, but OVox contains some additional cool effects. It’s actually marketed as a vocoder and vocal effects plugin.
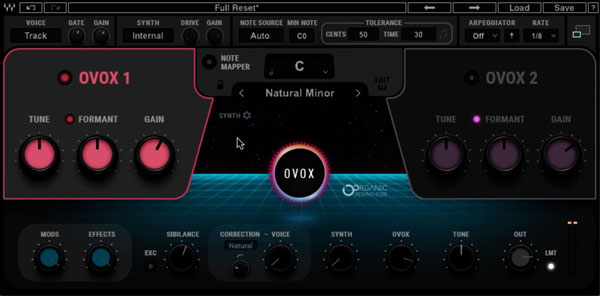
You can quantize notes to a particular key using the note mapper, mess with the tuning of the processed sound, the formants, and the gain. You can add a second voice and control the same parameters. Creating a perfect 5th with the two voices can sound really nice.
There’s also an arpeggiator that will arpeggiate the chords you play in various different ways.
Down at the bottom of the interface, you’re able to control the blend between the direct signal, the synth, and the processed signal produced by OVox. I generally keep the Voice and Synth knob turned all the way down, while keeping the OVox knob turned up, but you might want to try blending them in different ways.
The Voice section actually lets you apply some interesting processing to the direct signal. You can filter it and quantize the pitch to varying degrees using a Natural, Hard, or Note mode. Natural and hard will quantize the pitch to the nearest note of the key you’ve selected—hard mode being more aggressive than natural mode—while Note will re-pitch the direct signal to match whatever note you’re playing on your keyboard.
You’ve also got a handy Sibilance knob that can help de-ess or add a bit of sibilance back into the sound produced by OVox.
If you click on the two rectangle buttons in the top-right corner of the interface, an entire effects and modulation section is disclosed, providing you with an EQ, 7 different effects, 4 modulators than can be switched between an LFO mode and step sequencer mode, two envelopes, and an amplitude, pitch, and formant follower.
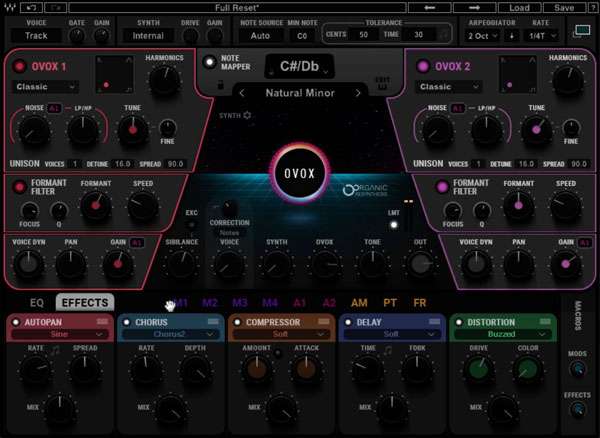
You can apply all these modulators to different parameters by clicking and dragging them to the parameter you’d like to affect.
If you toggle back to the default window, you can control modulation and effect depth using these two knobs. Finally, there’s an output knob that you can use to drive your signal into the built-in limiter.
This might be a lot to take in initially, but luckily, there’s a ton of presets you can use that sound really good. They’re broken up into different categories so whether you’re looking for vocoding effects, voice effects, or something else, you should have no problem finding what you’re looking for.
I’ll usually find a preset that I think sounds cool and then tweak some of settings to dial in the results.
Keep in mind that you don’t necessarily need to use a vocal recording as your modulator signal. If you want to apply OVox to a guitar track or drum track, that’s definitely an option.