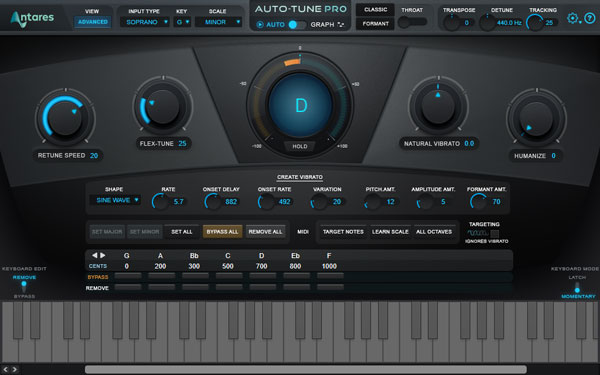
Antares' Auto-Tune Pro plugin is industry standard pitch correction software that every music producer and audio engineer should know how to use. I'm going to show you how to dial in Auto-Tune Pro's settings to achieve natural-sounding pitch-perfect vocals. On top of that, we'll take a look at T-Pain Auto-Tune settings that will yield a modern rap, pop, or RnB sound.
1. Choose an Input Type
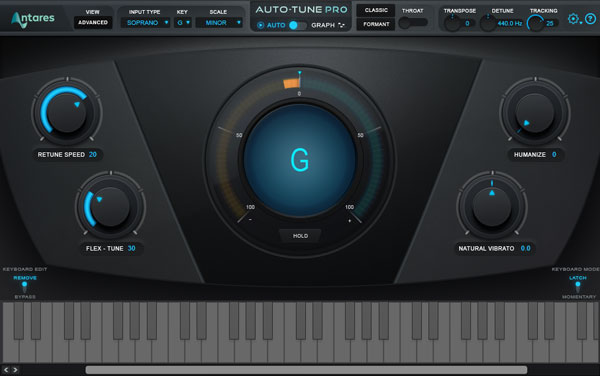
Auto-Tune Pro provides various processing algorithms. Each Input Type is meant to accommodate a different type of audio source. For example, you can select Soprano, Alto/Tenor, Low Male, Instrument, or Bass Instrument from the Input Type dropdown menu. Choosing an appropriate Input Type causes Auto-Tune Pro to detect pitch accurately, and apply pitch correction effectively.

2. Select a Key and Scale
By default, Auto-Tune Pro tunes notes chromatically, meaning that vocals will get tuned to the nearest note a singer is hitting—regardless of whether or not that note is within the key of your song. To overcome this issue, select the key of your song from the Key dropdown menu, and then select the appropriate scale from the Scale dropdown menu. With these settings dialed in, your vocalist won't be able to hit an incorrect note.

3. Reduce the Retune Speed
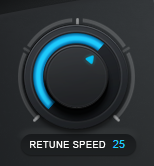
Auto-Tune Pro's Retune Speed knob adjusts how quickly pitch correction is applied to incoming audio. Turning this knob counterclockwise will reduce how aggressively pitch correction is applied. In contrast, turning this knob clockwise towards a value of 0 will increase how aggressively pitch correction is applied.
A Retune Speed around 25 tends to work quite well for most melodic vocals if a natural sound is what you're looking for. Some additional settings will need to be adjusted to complete the natural effect, but we'll take a look at those settings in a moment.
Ideally, you don't want the pitch correction applied by Auto-Tune Pro to draw attention to itself. The more pitch-perfect your vocalist is to begin with, the less processing Auto-Tune Pro needs to apply, meaning the final result will sound more natural.
A pitchy vocalist is significantly harder to process than a trained vocalist, and you might be required to manually edit each note using Auto-Tune Pro's Graph mode. Graph mode deserves its own article, but you'll be able to process most vocals solely using the following steps.
For more of a modern rap/pop/RnB sound, a Retune Speed around 12 will get the job done. You'll clearly hear the effects of pitch correction being applied. At this point, you'll be using pitch correction as a creative effect, as opposed to a corrective tool. A fast Retune Speed will result in the T-pain Auto-Tune sound from the late 2000s that's still popular today.
Artists like 100 Gecs have taken creative pitch effects to the next level. Laura Les, the lead singer of 100 Gecs, has achieved an iconic hyperpop sound via the use of extremely hard-tuned vocals that have been pitched up significantly.
To create this 100 Gecs vocal effect yourself, transpose your vocal recordings up an octave, and then apply an instance of Auto-Tune Pro with the Retune Speed set to a value of 0.
Engaging Auto-Tune Pro's Classic mode will result in a bright tonality, along with a prominent attack and transition between notes at fast Retune Speeds; you can leverage this setting to create extremely robotic vocal effects.

4. Control Pitch Correction Artifacts
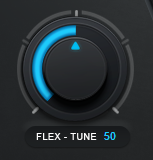
With the Flex-Tune knob set to a value of 0, Auto-Tune Pro will attempt to pull every portion of a sound to a target scale note. The sound of this process taking place is what many people identify as the "sound" of Auto-Tune. For a traditional Auto-Tune sound, leave the Flex-Tune knob set to 0.
Turning up the Flex-Tune knob selectively applies pitch correction as a vocalist approaches notes, which preserves natural vocal gestures. You can perfectly dial in the Flex-Tune knob to achieve natural-sounding pitch correction by starting at a value of 60, reducing the value of the knob until pitch-snapping becomes slightly audible, and then increasing the value of the knob by 10 to remove pitch-snapping artifacts.
It's worth noting that the Retune Speed and Flex-Tune knobs heavily influence each other. For example, a fast Retune Speed will require a large Flex-Tune value to sound natural. I recommend using a slightly faster Retune Speed than you think you need, and then using the Flex-Tune knob to massage the sound of the effect into place.


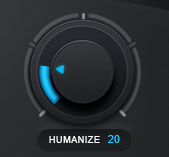
5. Tweak the Humanize Knob
The Humanize knob reduces the Retune Speed during long sustained notes. This is useful is you need to use a fast Retune Speed to quantize the pitch of short notes, but don't want sustained notes to sound unnaturally static and robotic.
When processing an organic vocal ballad, you may want to consider turning up the Humanize knob. However, for most modern rap, pop, and RnB vocals, in which vocalists are hitting straight notes, you'll want to leave the Humanize knob set to a value of 0.
6. Adjust Vibrato Intensity
Auto-Tune Pro's Natural Vibrato knob either enhances or diminishes the intensity of the natural vibrato (pitch modulation) present within a vocal performance. For this knob to take effect, the vocal performance you're processing needs to contain natural vibrato.
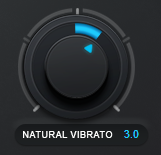
If the performance doesn't contain vibrato, but you'd like to add vibrato, you can adjust the Create Vibrato functions found within Auto-Tune Pro's Advanced view.
These functions are somewhat outside the scope this article, but they'll allow you to dial in vibrato effects on sustained notes, similar to the vibrato applied to Post Malone's vocals in the song "Circles."
7. Choose the Right Version of Auto-Tune
Auto-Tune is now available in various different versions. Auto-Tune Access ($99) provides basic real-time pitch correction, allowing you to manipulate a Retune Speed and Humanize Knob.
To gain access to a Flex-Tune and Vibrato Knob that will allow you to dial in a tighter natural-sounding pitch correction effect, you'll need to jump up to Auto-Tune Artist ($299).
The most comprehensive version of Auto-Tune, called Auto-Tune Pro ($399) includes a Graph mode that lets you manually adjust the pitch of notes.
Auto-Tune Artist and Auto-Tune Pro both come bundled with Auto-Key ($49), which is a plugin that identifies the key of audio that you run through it. You can analyze the key of an instrumental and then use Auto-Key's "Send to Auto-Tune" feature to automatically update the Key and Scale settings within Auto-Tune Access/Artist/Pro.
These products are all available as part of Antares' Auto-Tune Unlimited subscription bundle that costs either $24.99/month or $249/year. Some additional products like Auto-Tune EFX+ and Auto-Tune Hybrid (optimized for Avid DSP systems) are included in the bundle as well.