


The best way to speed up your Ableton workflow is by applying organization, automation and preparation techniques. I have saved myself well over a hundred hours of redundant work because I've optimized my workflow. Now, I'm going to share my 6 most helpful tips with you!
1. Project Templates
There are 3 project templates that I use:
- Production Template
- Vocal Session Template
- Mastering Template
- You can download all three of these templates here.
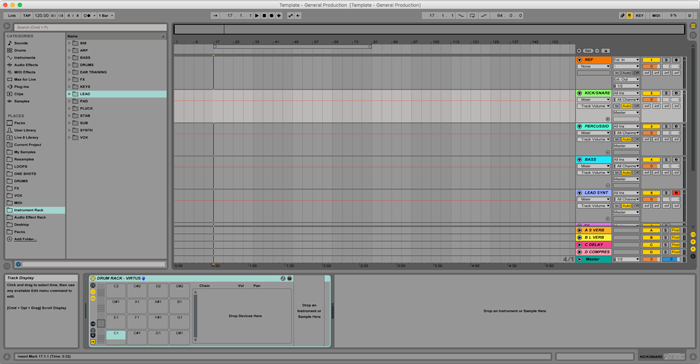
The Production Template is what I use when I start writing a brand new song. I like to start with a drum rack that consists of just kicks and snares, a drum rack with other percussion, a track for my bass, a lead synth and a group for FX. I know that I'm pretty much using all of these elements in every one of my tracks so it just saves time by having them ready to go. Everything else I'll just add as I go!
I actually record vocals in Logic due to its amazing comp folder feature. It allows me to quickly pick my favorite parts from different vocal takes, and fade them together. It’s pretty much the only thing holding me back from working exclusively in Ableton. However, I've included the exact same template I use in Logic as an Ableton Project Template!
The Mastering Template I've included is simple and straightforward. There's a reference track with its output set to Direct Out, which allows it to bypass the master channel, providing you with an unaffected reference track. The Pre-Master track is where you load up your mix. Make sure to apply all your master processing on the master channel! To quickly toggle between the reference track and your master, solo and un-solo the reference track.
Note: Customize these templates to your liking. Use your favorite plug-ins or check out The Ultimate List of Plug-In Companies for some recommendations!
2. Default Audio Effects
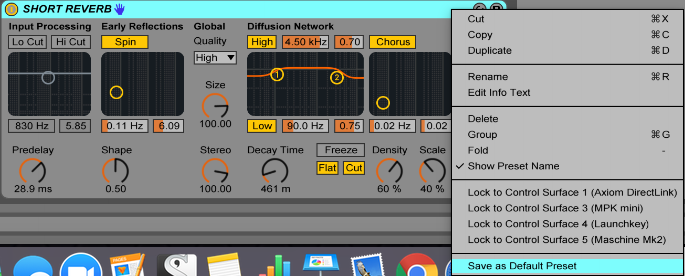
Did you know that you can overwrite default audio effect settings with different ones? Let’s say you don’t like how the default Reverb settings sound. Modify them to taste, right click on Reverb’s title bar in the device view and select “Save as Default Preset”. Now, every time you drag Reverb onto a new track, it will load with these updated settings. This works for all of the audio effects.
3. Processed Sounds
You can save instrument effect racks which means that you can load completely processed sounds into your projects. Maybe you’ve perfectly dialed in this one synth and you want to use it in your other projects. Save the instrument effect rack into your browser library by clicking on the floppy disc icon and name it whatever you like. You can use Ableton’s file sorting system or save the presets into your own file directory. To use the sound you saved in a different project, drag it out of the browser and onto a new track. Since it’s already completely processed it's going to save you a ton of work, allowing you to focus on writing music.


4. Loops and Presets
Artists get a lot of grief for using loops and presets, and some people would consider it “cheating”, but the truth is that it’s just a great way to save time.
If I have a percussion loop that I love, but I’m scared to use because it’s a loop, all I’m doing is robbing a song of its potential. Don’t let your pride get in the way of making great music!
The same thing goes for presets. You’re not trying to invent the wheel here, you’re trying to write a song. With EDM nowadays it’s pretty hard to create a sound in Serum that hasn’t already been done in one way or another before. It’s not what you use, it’s how you use it. If you’re able to implement a preset into your song in a way that compliments the song, who cares if it’s a preset? Unique sound design is great, but it’s only one piece of the larger puzzle. It doesn’t define your song; it’s simply a device used to help convey a feeling to the listener. If the patch you’re using accomplishes the feeling you’re trying to achieve, use it!

5. Organize Your Sample Library
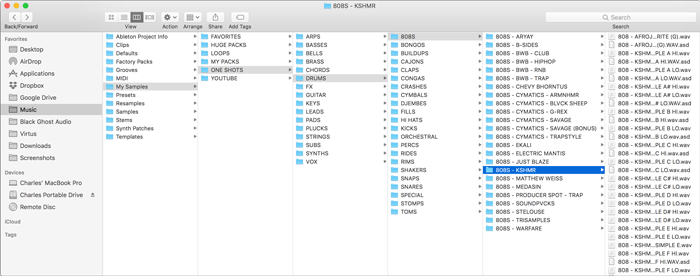
It's just as grueling and painful as you imagine, but totally worth it. I spent about 12 hours one day completely reorganizing my sample library. I’ve come up with a hierarchy system that’s so simple to use that even my grandma could use it (and she just learned how to send emails!). This file directory is essentially broken down into two paths; loops and one-shots.
If you find yourself using certain samples a lot, make a folder with your favorite samples in it! It’s kind of like making your own personalized sample pack. This will save you digging through a bottomless pit of Cymatics samples.
6. Keybindings
Check out The EDM Artists Guide to Studio Gear for a full rundown of how I have my Ableton key commands bound to my Razer Naga Chroma Mouse. It has 17 bindable buttons, so it’s definitely worth checking out. This mouse is also awesome if you’re into gaming, as that's what its intended for. I’m going to keep buying these mice until Razer stops making them.

By implementing these 6 workflow techniques, you're sure to speed up your workflow. If you have any additional techniques that you find useful, leave them in the comment section below!
If you like streamlining your workflow, check out the following video. I demonstrate my favorite home studio workflow hack.
Want to produce radio-quality songs using Ableton? Check out Black Ghost Audio's Music Production for Beginners video course. Produce three songs from start to finish and learn the skills you need to write, record, mix, and master music at home. No experience required. Click here to learn more and produce your first song in under an hour.


