

One of the biggest misconceptions about processing dialogue is that with the right processing chain, you can make a low-quality recording sound professional. That's simply not the case.
To end up with a final product that sounds pro, you need to start with a high-quality recording. This doesn't mean you need to record in a high-end recording facility or use an expensive microphone. On the contrary, you can capture top-end dialogue recordings at home with a $100 microphone.
Quick Recording Tips
The space that you record in has a drastic affect on the quality of your recordings. You want to record in a space that's quiet and free of low-level noise. Some examples of low-level noise include refrigerator hum, air conditioning noise, computer fan noise, and street noise leaking through a window.
If you have a walk-in closet full of sound-dampening clothing, it can work as a great recording space. Another option is to create a cheap homemade recording booth using moving blankets, which I show you how to do in my Music Production for Beginners course.
You also want to make sure that you record using a pop filter, which is a piece of fabric attached to a ring that you place between your mouth and microphone. It reduces plosives, which are large low-end transients caused by bursts of air leaving your mouth.
Placing your microphone close to your mouth is another effective way to reduce background noise. When your microphone is positioned close to you, you don't need to turn up the gain on your audio interface as much as if it were positioned further away. A close mic placement results in a lower noise floor, reducing the amount of noise-reduction that you need to apply using a plugin.
Here's an example of the raw recording that we'll be working with:
This recording was captured using a Shure SM7B microphone running through a Cloudlifter and then into my audio interface. A Cloudlifter is a device that provides low-output dynamic mics like the Shure SM7B with a clean gain boost, reducing the noise floor of your signal.
No processing has been applied to the audio example above. As you heard, it already sounds pretty good. You could use this recording as it is and most people wouldn't think twice about the quality. However, we're going to bring it up to an industry-standard level.
1. Remove Noise
The first plugin that you should add to your processing chain is a de-noise plugin. My personal recommendation is iZotope's RX Spectral De-Noise module. I think it provides one of the best de-noise algorithms on the market.
To use this plugin, loop a section of your audio where you're not speaking. Make sure your selection contains steady low-level noise. Click RX Spectral De-Noise's "Learn" button; this will create a noise profile. Drop the level of the Reduction slider until the low-level noise becomes barely audible.
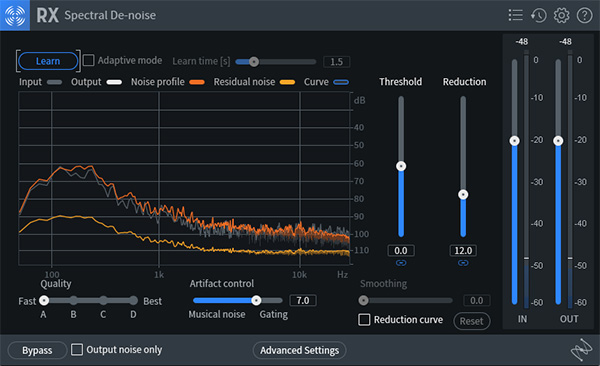
Then, adjust the Threshold slider to selectively target the noise, while leaving spoken audio content unaffected. High values can result in desirable audio content being reduced in level (muffled sound), while low values may not reduce low-level noise sufficiently. The goal is to reduce low-level noise while leaving dialogue unaffected.
If you turn up the level of your speakers, you'll be able to hear some low-level noise at the beginning of the following audio example. With noise reduction applied, the low-level noise becomes unnoticeable.
2. Reduce Dynamic Range
An audio signal that's dynamic will drastically jump up and down in level. Quiet sections will sound very quiet in comparison to loud section. When you apply dynamic range reduction to a dialogue recording, the level of loud sections are brought down in level, making the difference between quiet sections and loud sections less significant.
Why would you want to decrease the dynamic range of an audio signal? Well, doing so makes dialogue recordings easier to listen to. If you're listening to a podcast in which the host is whispering, and then they scream, it's going to hurt your ears. If you apply a device called a compressor to your dialogue recordings, you can avoid this issue — the compressor will automatically reduce the level of audio content when it gets too loud.
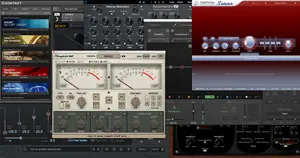
In the following video, I demonstrate how to apply compression to sung vocals using Waves SSL G-Master Buss Compressor. However, all of the same concepts apply to processing dialogue. If you're new to using compression, this video is a great place to start because it walks through all the common controls found on a compressor, and explains how to dial in appropriate settings.
When you over-compress dialogue, the person that you've recorded can start to sound like they have a lisp. If you notice this occur, slightly reduce the amount of gain reduction that you've applied. Alternatively, turn up the compressor's attack time so that it doesn't respond as aggressively to incoming audio material.
3. Sculpt the Tone
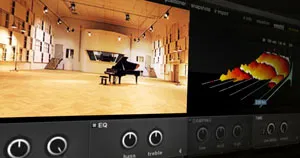
It's important to cut away deep low-end frequencies from dialogue recordings. Low-end frequency content can manifest itself as "rumble" through sound systems that include a subwoofer. You can remove low-end rumble by inserting an EQ onto your dialogue track and applying a low-cut filter with a gradual slope. Feel free to use your stock EQ to do this, or reach for a more surgical solution like FabFilter's Pro-Q 3.
If you own a subwoofer it will be easy to hear where you should apply a cut because low-end rumble will disappear but your dialogue will still sound rich and full. Assuming you don't own a subwoofer, you're essentially shooting in the dark because you probably won't be able to hear existing low-end rumble in the first place. Apply a cut at 80 Hz to play it safe and move on to the next step.
Note: Use your audio interface's low-cut filter option when recording dialogue, assuming it provides this feature. It will often eliminate the need to apply a low-cut using a plugin. I used my audio interface's low-cut feature when recording the dialogue example that you've been listening to, which is why it's free of low-end rumble.
You may also want to apply a gradual top-end boost using a high-shelf filter around 5,000 Hz; this can enhance clarity and make your dialogue recordings more articulate. In the following audio example, I'm only boosting the top-end of my dialogue recording by 1 dB but it makes a noticeable difference.
4. Maximize Loudness
Clipping is a form of waveform distortion that sounds "crackly" and undesirable; it occurs when the level of your audio exceeds the digital maximum (0 dB) ceiling of your DAW. Peaks that jump above 0 dB are automatically truncated when they run through your audio interface's D/A converter. If you turn up the level of your dialogue too much, it will clip.
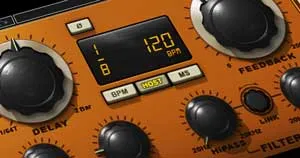
To maximize the loudness of your dialogue while avoiding clipping, you'll need to use a limiter. A limiter is an extremely aggressive compressor that prevents peaks in your dialogue from exceeding the threshold level that you've set.
FabFilter's Pro-L 2 is my favorite limiter due to the number of processing options it provides but you can use your DAW's stock limiter as an alternative. Set the ceiling of your limiter to -2 dB and then increase the input gain until you see 1 dB of gain reduction being applied to the loudest sections of your dialogue recording.
You don't want to heavily limit your audio here. The goal is simply to boost the level of your audio as much as you can, while avoiding clipping. If you heavily limit your dialogue, it will start to sound unnatural and become exhausting to listen to over an extended period of time.
The reason you should leave 2 dB of headroom is that when you upload your dialogue online, it's going to get transcoded from one codec (audio format) to another. Audio transcoding can result in distortion if you don't leave some headroom. In most cases, 2 dB is enough headroom to avoid distortion.
Here's the final before and after comparison. We've successfully reduced low-level noise, applied dynamic range reduction, removed low-end mud and enhanced brightness using an EQ, as well as maximized loudness with a limiter.
Depending on how much time you want to spend manually cleaning up your dialogue, the next step is to manually remove mouth noises, lip smacks, heavy breathing, etc. You can do this by trimming the audio clips in your DAW. Cleaning up a 1-2 hour podcast in this way can be quite a pain but it will result in pristine dialogue.