


Audio clipping is form of waveform distortion that occurs when an amplifier tries to produce an output voltage beyond its capability. When you clip the master bus in your digital audio workstation (DAW), it can make your music feel more distorted, warm, aggressive, punchy, and present. We’re going to take a look at how to correctly clip your master bus to ensure your masters sound consistent across various playback devices.
Clipping your masters just involves boosting the level of your master bus fader, right? Technically, doing so will clip the audio signal you hear, but there’s a major flaw in applying clipping in this way.
Your DAW processes audio in a 32-bit floating point work environment, which retains audio information above 0 dB. This means that it's quite difficult to accidentally clip audio within your DAW. When you run 32-bit audio with information above 0 dB out of your DAW and through your audio interface's D/A converter, information above 0 dB will clip.
The main point to keep in mind is that when you try to clip your master bus by boosting the master fader, your audio will clip once it hits your D/A converter, but not within your DAW. It's unlikely that you'll end up bouncing 32-bit files for distribution, but if you did, someone could potentially apply a limiter to your track which would remove the effects of clipping before it hit their D/A converter.
You'll likely be bouncing 16-bit or 24-bit audio files. Unlike 32-bit files, 16-bit and 24-bit audio files can't save data above 0 dB, meaning any audio information above 0 dB will clip when you bounce your masters. The problem is that you won't know what the clipping applied by the export process sounds like until you bounce the files. On top of having no control over how clipping is applied, it's time consuming to keep bouncing and auditioning your masters in this way.
To apply clipping within your DAW and accurately audition its effects before bouncing your masters, you’ll need a limiter like FabFilter’s Pro-L 2 and a clipping plugin like Kazrog’s KClip 3.
1. Apply a Limiter to Your Master Bus
Apply a limiter to your master bus as you normally would while mastering. Dial in your settings to achieve the tone you’re looking for, but don’t apply dither at this point. You’ll be applying dither later on.

2. Reduce The Output Level of Your Limiter to -1 dB
Reduce the output level of your limiter to -1 dB to provide your master with enough headroom to survive the process of transcoding when uploaded to streaming services. You should do this normally, even when you don’t plan to clip your masters. Leaving 1 dB of headroom will result in less distortion when your masters are converted into codec formats like MP3 or AAC and played at reduced bit rates.

3. Apply a Clipper to Your Master Bus
Apply Kazrog’s KClip 3 to your master bus, after your limiter. A limiter is typically the last device you add to a mastering chain since it prevents your signal from exceeding 0 dB, but there are situations in which you'll put another device last in your chain. KClip can prevent your signal from reaching above 0 dB with its ceiling function, while clipping your signal within your DAW.


Keep in mind that the effects of clipping can be rather harsh, so it's often best to control your mix with a limiter before clipping your master bus.
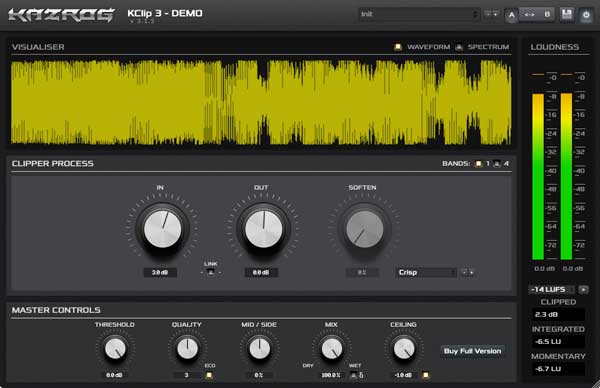
4. Set Your Clipper's Ceiling to -1 dB
Enable KClip’s ceiling function and set it to -1 dB to provide yourself with 1 dB of headroom. The ceiling is a non-oversampled clipper that stop peaks at the native sample rate, keeping traditional meters happy.

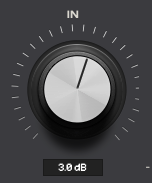
5. Increase Your Clipper's Input Gain to Clip Your Master Bus
Now you’re ready to drive your signal through KClip to clip it. Increase the input gain until you’ve clipped the signal to your liking. When doing this, you want to balance loudness and aggression with low-end clarity. Your bass is one of the first elements in your mix to fall apart when clipping your master, so listen critically to ensure you aren’t overdoing this effect.
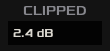
For reference purposes, KClip 3 includes a meter that tells you how much your audio signal is clipping.
Genres like dubstep, trap, and metal, that typically contain distorted low-end elements, are often capable of being clipped harder than genres that rely on low-end clarity. For example, you may not like how clipping a clean pop mix sounds. Experiment with clipping different styles of music and you’ll quickly discover when it’s appropriate to clip your master bus.
6. Automate Your Clipper On and Off
Some people like to drive their limiter a bit harder during the choruses or drops in their songs. You can achieve a similar effect using a clipping plugin.
By default, keep KClip 3 bypassed. During the drops of your song, use an automation lane to enable KClip. You’ll notice that your drops feel noticeably more impactful in comparison to your buildups.

7. Dither When You Export Your Master
FabFilter’s Pro-L 2 provides the option to apply dither, which is low-level noise that prevents audio artifacts from occurring when exporting your song at reduced bit depths. The issue here is that dither is always meant to be applied at the very end of your master chain, but the Pro-L 2 isn’t the last plugin in this situation.
You’ll need to apply dither when exporting your file. Ableton provides the option to apply dither when exporting, but if you’re DAW doesn’t provide this feature, you can apply dither using a second instance of FabFilter’s Pro-L 2 with dither engaged and no other processing applied.


