


Sample rate and bit depth are two values that you've likely noticed within your digital audio workstation's export settings. Sample rate refers to the number of samples an audio file carries per second, while bit depth dictates the amplitude resolution of audio files.
The one question I'm asked all the time is, "Which sample rate and bit depth settings should I use when exporting my track?" Before cracking into the technicalities behind this, I want to give you four golden rules to live by:
- When sending your mix to a mastering engineer, always export your song at the sample rate you've recorded at. Most people tend to record and produce music at a sample rate of 44.1 kHz, but if you've recorded your audio at a higher sample rate, export your project at the higher sample rate.
- When sending your mix to a mastering engineer, export your mix, without dither applied, at the bit depth that your DAW processes audio at. Most DAWs process audio internally at a bit depth of 32 (floating point), but not all of them. Refer to your DAW's user manual to identify the bit depth at which it processes audio internally.
- When mastering a song yourself, reduce sample rate based on destination formatting requirements. For example, Distrokid allows you to upload songs up to a sample rate of 96 kHz, so if you've recorded audio at 192 kHz, you'll need to export your files at 96 kHz. However, if you've recorded audio at 44.1 kHz, you'll export your track at 44.1 kHz as well. Never increase sample rate when exporting a track.
- When mastering a song yourself, and when you plan to upload your music to streaming services, always export your song at a bit depth of 24 and make sure to apply dither. If your music distributor requires you to upload 16-bit files instead of, or in addition to 24-bit files, make sure that you apply dither as well.
Sample Rate
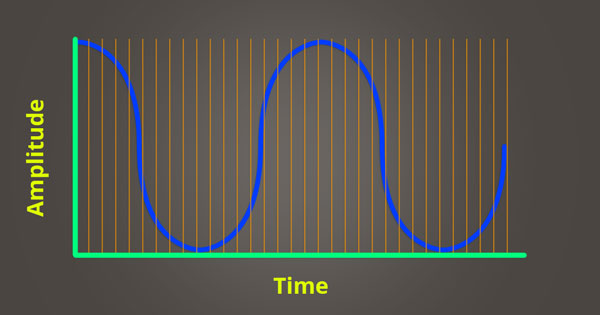
Sample rate refers to the number of samples (tiny slices of audio information) that are present within one second of digital audio. Let's assume you're recording a one-second guitar clip. There's no higher audio quality than the sound coming out of the guitar and directly hitting your ear.
When recording the guitar for playback at a later time, things change. A microphone picks up the sound waves coming out of the guitar, and it converts those waves into an electrical signal. That electrical signal is sent through a cable to your audio interface. Your audio interface performs A/D (analog to digital) conversion, changing the electrical sound wave into a series of data values that your computer can store. At this point, sample rate becomes a factor.
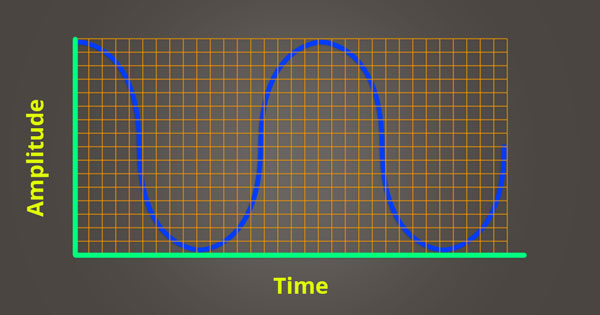
Similar to how films are just pictures being played in succession, digital audio is also just tiny samples being played one after another. If you record one minute of video at a high frame rate, the fluid motion of it will be much greater, making it appear more life-like. This same concept applies to audio as well. The higher your sample rate, the more accurately it will depict the original analog audio waveform. It's important to keep in mind that you can't upgrade the sample rate of an audio file once it's been recorded.
If you record your guitar at 44100 samples/second, that's all the information you have to work with. Even if you bounce the guitar file out of your DAW at 96000 samples/second, the guitar will still playback as a 44100 samples/second file. This is why it's important to know your destination sample rate before recording.
If you know you're going to be performing creative audio manipulation that involves time stretching audio files past their recorded length, you may choose to record at a higher sample rate (if your audio interface allows for it). Time stretching an audio file that was recorded at 192000 samples/second can maintain its fidelity far past the point of an audio file that was recorded at 44100 samples/second.
Vince Tennant demonstrates the benefits of recording at 192000 samples/second in the following video using a Sanken CO-100k microphone that is capable of recording up to 100 kHz; it appears as though he's actually pitched the recording down (resulting in time expansion) and then applied time compression to re-align the sound with the voice actor's lip movements.
Does this meant that you should always record at the highest sample rate possible? Not necessarily. You should record at the sample rate of your final destination format. If you're recording a vocalist, for a song, this is probably going to be 44100 samples/second, whereas the the regular dialog for a film would likely be 48000 samples/second. There are actually downsides to recording at unnecessarily high sample rates, as is demonstrated by Mark Furneaux in great detail.


Bit Depth
Bit depth dictates the number of possible amplitude values of one sample. Pulse-code modulation (PCM) is the standard form of digital audio in computers. The amplitude of an analog signal is sampled at regular intervals (higher sample rate = shorter intervals) to create a digital representation of the sound source. The sampled amplitude is quantized to the nearest value within a given range. The number of values within this range are determined by bit depth. To better explain this concept, I'll use an example:
On a television you can set the volume to it's minimum amplitude (0dB) or to it's maximum amplitude (70dB). If the television only allows you to set 5 different volume levels (ranging from 0dB to 70dB), it would be considered to have a low amplitude resolution. What if you wanted to set the volume between it's 3rd and 4th volume setting? You wouldn't be able to because its amplitude resolution is too low. If the television allowed you to choose from 100 different volume levels (ranging from 0dB to 70dB), it would be considered to have a high amplitude resolution. The minimum and maximum amplitudes haven't changed, but you're now capable of selecting more fine-tuned amplitude levels. This concept is very similar to how bit depth works.
You can calculate the number of possible amplitude values for a given bit depth by using the equation 2 to the power of n (n being your bit depth). At a bit depth of 16, each sample's value is one of 65536 (2 to the power of 16) possible values. At a bit depth of 24, each sample's value is one of 16777216 (2 to the power of 24) possible values. The higher bit depth doesn't make your song louder, it just provides a higher quality amplitude resolution (similar to how the television with 100 volume levels lets you set more fine-tuned levels than the television with 5 volume levels).
A higher bit depth will produce a higher resolution sample. The more dynamically accurate your samples, the truer they'll be to the analog sound source they're meant to reproduce. Lower bit depths produce a lower signal-to-noise ratio (which you generally don't want), but will also yield smaller file sizes. Applying dither and noise shaping at a mastering level can help reduce the noise that results from exporting at lower bit depths.
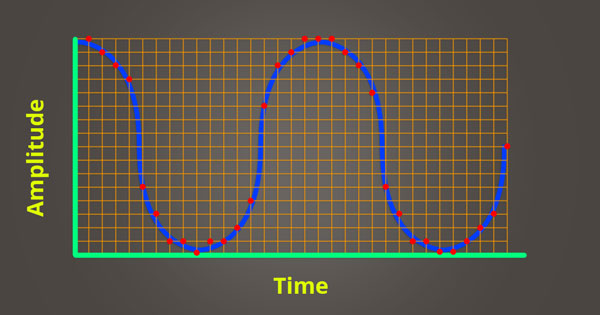
In the following image, you can see that each data point (red) is plotted at an amplitude and time value close to the continuous analog waveform. Although, since you need to save an audio file using finite data points, there's bound to be some level of sampling inaccuracy, which is referred to as quantization error.
32-Bit Floating Point Digital Audio
In your DAW, information that reaches above 0 dB is clipping, right? Actually, this isn't the case—information above 0dB isn't lost until it's truncated by your D/A converter, or exported to a fixed point file format (such as 16 or 24-bit fixed point). Applying a 32-bit limiter to the stereo buss in your DAW will prevent clipping from occurring; even if the signal running into the limiter is peaking well above 0dB. Yes, this means all the individual tracks in your DAW can be peaking above 0dB, as long as you apply a 32-bit limiter on your master buss. No, this isn't going to make your music louder.
If you export a 32-bit floating point file, the points above 0 dB will be saved to the file you export. However, if you try to playback the file through your audio interface, your 24-bit fixed point D/A converter will cause the information above 0 dB to disappear. This doesn’t mean the information is missing from the digital file on your computer, your D/A converter just can’t reconstruct the digital signal above 0 dB in the analog realm.
If you send a 32-bit floating point file that’s peaking above 0 dB to your mastering engineer, they can reduce the level of the file when they import it into their DAW. The main benefit of bouncing 32-bit floating point audio files is that it allows you to send your tracks to a mastering engineer without requiring you to apply dither to your audio files. To be quite clear, 32-bit floating point audio files are not meant for distribution—they simply allow you to maintain pristine audio quality when sending audio files to an artist or engineer you're working with online.


