


Ableton is a DAW that's packed with cool features that allow for an incredibly fast workflow. Over the past decade, I've picked up a handful of Ableton tricks that I use all the time but that many people don't know about. We're going to take a look at 6 essential Ableton tricks that you can use to make producing music faster, easier, and more organized.
1. Cut, Paste, Duplicate, and Delete Time
Cutting, copying, deleting, and pasting time is a little different than applying the same processes to audio clips. Let's say you've already written a full song but decide that you want to change its structure. Perhaps you want to remove the pre-chorus from the arrangement and add a bridge between your chorus and second verse.
Highlight the pre-chorus and then navigate to Edit > Delete Time. Optionally, you can use the keyboard shortcut [Ctrl[Shift][Delete] or [Cmd][Shift][Delete].
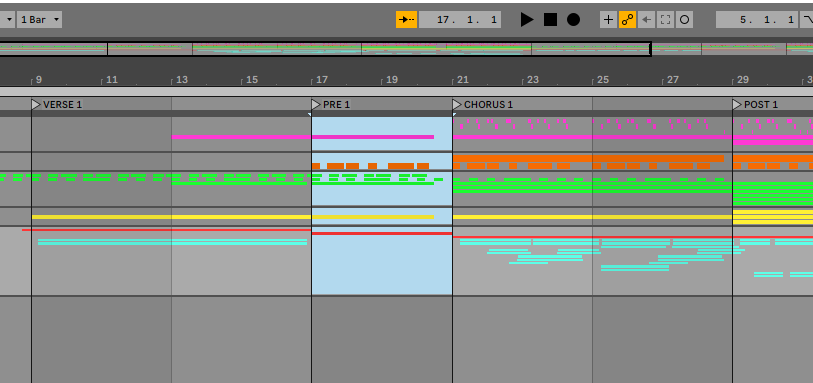
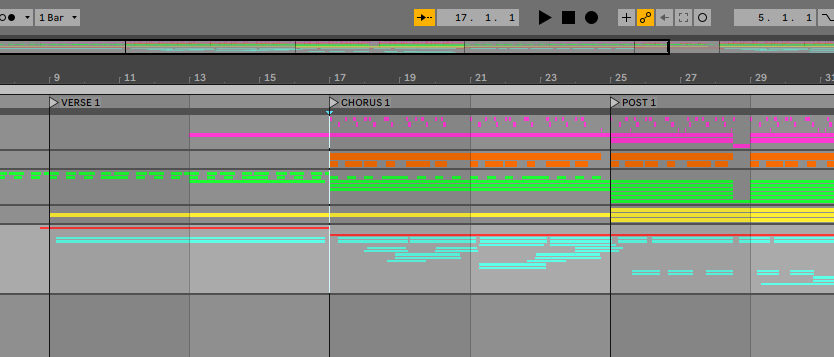
This will eliminate that section of time from the timeline, as opposed to simply deleting the audio/MIDI clips within that section.
These are the keyboard shortcuts for Ableton's other time-related editing functions:
- Cut Time: [Ctrl][Shift][X] or [Cmd][Shift][X]
- Paste Time: [Ctrl][Shift][V] or [Cmd][Shift][V]
- Duplicate Time: [Ctrl][Shift][D] or [Cmd][Shift][D]
- Delete Time: [Ctrl][Shift][Delete] or [Cmd][Shift][Delete]
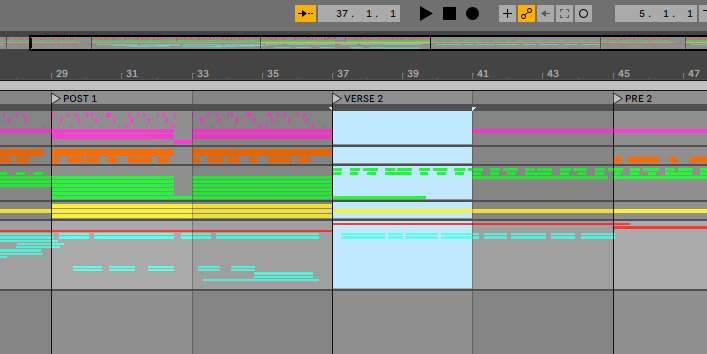
To make space for a bridge, highlight a portion of your second verse and then navigate to Create > Insert Silence, or use the keyboard shortcut [Ctrl][I] or [Cmd][I]. This will add silence to your arrangement before the second verse, providing you with space to add a bridge.

2. Use Ableton's Second Window With Two Monitors
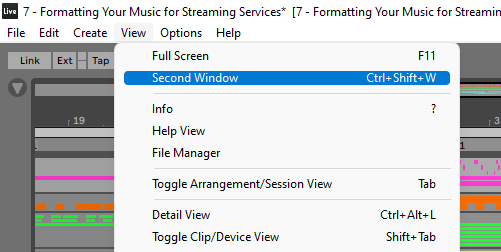
If you own two computer monitors, you can work with Ableton's Arrangement View on one screen, and monitor track levels using Ableton's Session View on another screen. Navigate to View > Second Window to display the currently non-active view. This is particularly useful when you're setting track levels because Ableton's Arrangement View doesn't provide numerical values beside the volume meters in the Mixer Section.
3. Edit Custom Info Text
If you click on the disclosure triangle in the bottom-left corner of Ableton, default tooltip information will appear when you hover over different features. Although, you can add custom info text to any audio clip, MIDI clip, audio effect, MIDI effect, virtual instrument, third-party plugin, or track in Ableton—overwriting the default tooltip in the process.
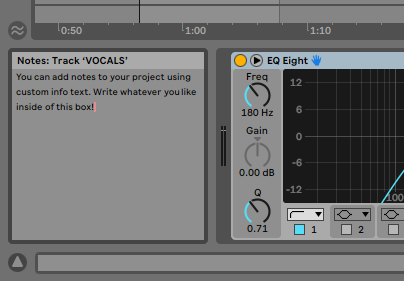
To add custom info text, right-click on a feature and select "Edit Info Text". This is especially useful when collaborating with other artists. Perhaps you've created a custom Effect Rack that's performing a slew of processing to a guitar track. Adding custom info text allows you to leave a note for your collaborator, explaining what the Effect Rack is doing.
In large projects, leaving notes for yourself can come in handy as well. Maybe there are some challenges you're facing with an uncooperative vocal track. Instead of getting caught up on it and losing your momentum, you can leave a note on the track, list the issues you're facing, and come back to it later.


4. Leverage Ableton's Groove Pool
Ableton's Groove Pool is likely one of the DAW's most underutilized featured. It's a library of grooves that you can apply to audio clips and MIDI clips. Groove Pool lets you affect the timing and velocity of your arrangements. You can use this to infuse boring and static clips with swing.
The Groove Pool is somewhat hidden so many people don't even know about it. First, you need to load some grooves into the Groove Pool. Navigate to the Grooves tab in Ableton's Browser.
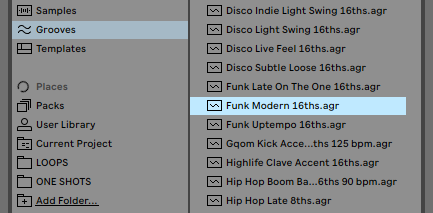
Audition some of the different grooves by clicking on them. If you can't hear them, click on the headphone icon so that it's highlighted in blue.
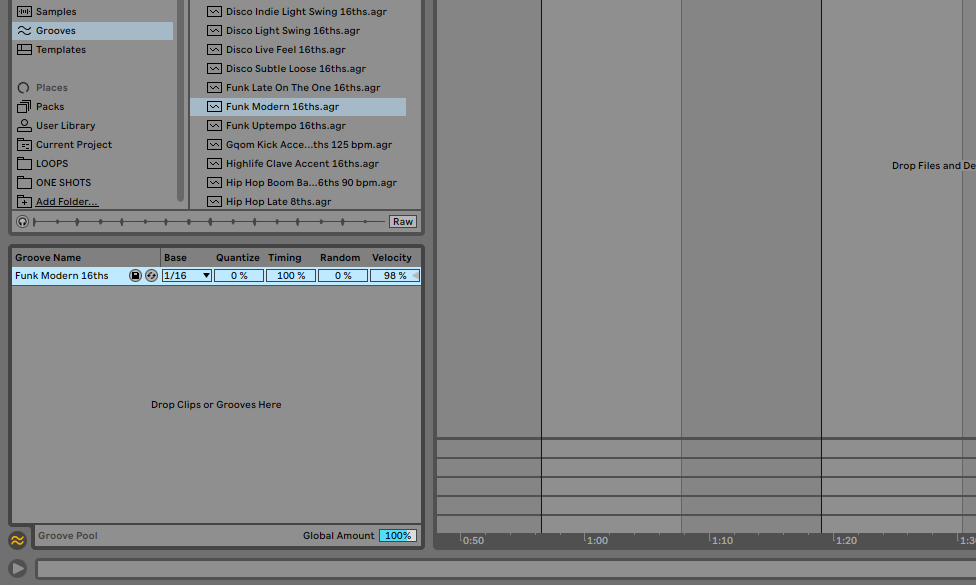
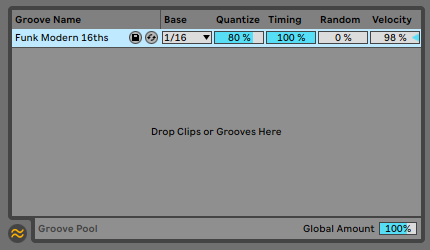
Expand the Groove Pool section by clicking on the Groove Pool icon (two squiggly lines) in the bottom-left corner. When you find a groove that you like, drag it and drop it into the Groove Pool.
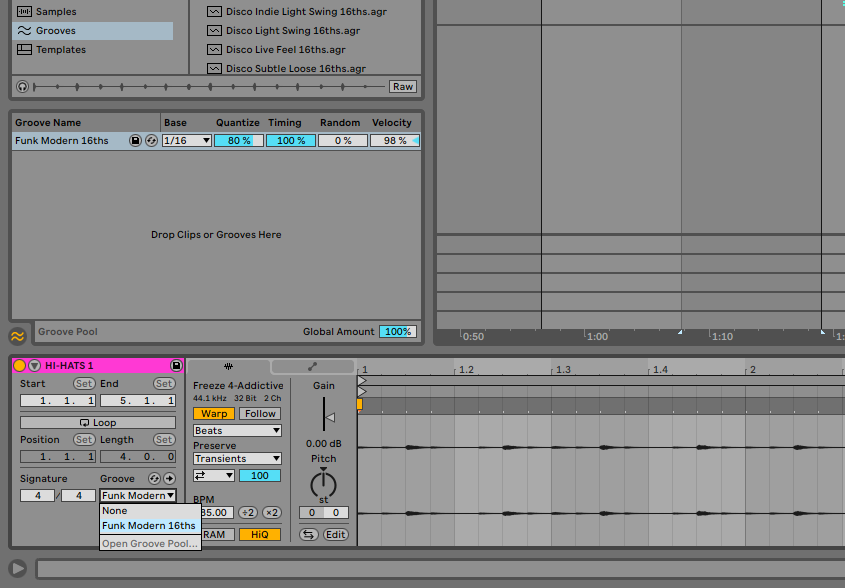
To apply a groove to an audio clip or MIDI clip, double-click on the clip. Use the keyboard shortcut [Tab] to bring up the Clip View Selector if it doesn't display by default. Make sure that the "Warp" button is highlighted in yellow if you're working with an audio clip. Then, select the groove that you loaded into the Groove Pool from the clip's Groove dropdown menu.
Modifying the Base, Quantize, Timing, Random, and Velocity values in the Groove Pool will change the affect that the groove has on the clip. Adjusting the Global Amount value scales the intensity of all the grooves in the Groove Pool.
Ableton also lets you extract grooves from existing audio loops. Maybe you have a closed hi-hat audio loop with a really cool groove that you want to apply to an open hi-hat loop. Right-click on the closed hi-hat loop and select "Extract Groove(s)". This will create a new groove in Ableton's Groove Pool that you can apply to the open hi-hat loop.

Applying grooves to drum loops that you download from Splice can help spice things up. I do this quite often when layering background perc loops into my songs.
5. Use Ableton's Sampler to Arrange and Edit Samples
It can be tempting to drag and drop one-shot drum samples onto audio tracks when you're trying to work quickly. The problem with doing this is that it becomes time-consuming to edit or replace your drum samples later on.
You either need to replace the existing audio files manually one at a time, or by navigating to View > File Manager > Manage Set > View Files. Find the file that you want to replace from the list and click the Hot-Swap icon. Find the file you'd like to use as the replacement within Ableton's Browser and then press [Enter].
That process can be somewhat tedious so I highly recommend using Ableton's Sampler instead. Insert Sampler onto a MIDI track and then drag and drop the one-shot sample that you want to use onto the area that says "Drop Sample Here". If you decide that you want to replace the sample later on, you can simply drag and drop a new sample into Sampler.
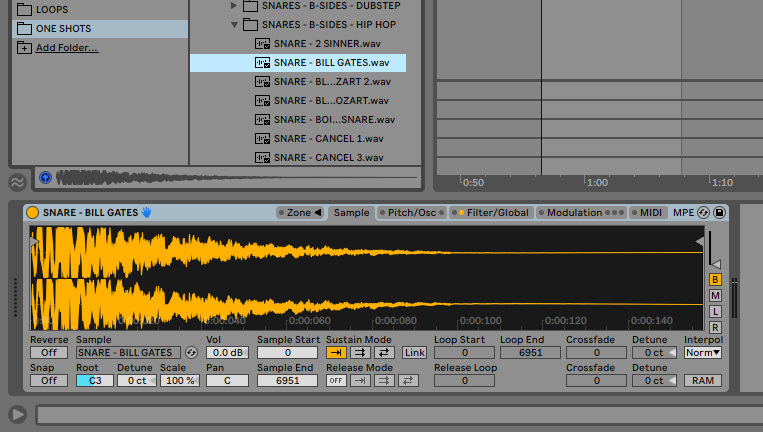
One of the primary benefits of taking this approach is that you can trim the start and end points of the audio clip, as well as edit the sample in various different ways. When you make changes in Sampler, it affects every instance of the sample in your project (on that MIDI track).
6. Edit Recordings Using Ableton's Take Lanes
Ableton introduced a new feature called Take Lanes in Ableton Live 11. When you loop-record a section of your song, each take is saved to a new Take Lane. You can view take lanes by right clicking on the title of a track in Arrangement View and selecting "Show Take Lanes". From there, you can audition each take separately and stitch together the best parts of each take.
Maybe you want to use the first part of your first take and the second part of your third take. Highlight the section that you want to use and then press [Enter]. This will move the clip that you highlighted to the active comp. Next, crossfade your clips together. When you play back your track, the best part of take one and take three will play into one another.

This was a feature that was sorely lacking in previous versions of Ableton and it made running recording sessions a nightmare. You had to record each take to a new audio track, which resulted in large and messy projects. In fact, I used to run recording sessions in Pro Tools because it provides a comp folders feature that's roughly equivalent to Ableton's Take Lanes feature. Then, I would pull my recordings into Ableton afterward.
I no longer need to do that because Ableton has stepped up its game. If you run recording sessions, you should be using this killer feature.
Want to learn how to write, record, mix, and master music at home? Check out Music Production for Beginners: The Complete Ableton Course. You'll produce three songs from start to finish and learn how to write, record, mix, and master music at home.


