

Poor quality audio recordings typically include clicks, clips, crackle, hum, excessive reverb, and noise, which are all issues that can be fixed while mixing. The process used to repair damaged audio files is called audio restoration. Your best bet is to avoid these issues altogether by recording audio properly, but sometimes you have to work with what you’ve got.
There’s no telling what type of problematic audio files a client might send you. As a mixing engineer, or post-production engineer, you’re sometimes asked to rescue absolute catastrophes. At the end of the day, you do the best you can do, inform the client of what their options are, and move on. If you have the right audio tools, you should be able to make a significant positive impact on your client’s project.
Before jumping into how to improve a poor quality audio recording, let’s get one thing straight: you can’t fix a bad performance. If you’ve recorded a vocalist and they gave a lacklustre performance, either find a new vocalist for your project, or coax a better vocal performance out of them. Either way, you’re going to have to re-record; some things just can’t be fixed.
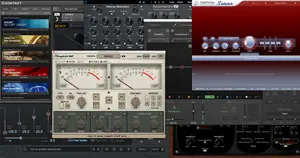
Recommended Audio Restoration Plugin Bundles
The majority of the battle is identifying the type of audio problem you’re dealing with and then picking the appropriate corrective tool for the job. In the following sections, I’ll be covering common causes for different audio issues and recommending specific tools you can use to correct them.
iZotope’s RX 7 bundle is one of the most comprehensive audio repair plugin bundles on the market. RX 7 Elements will remove clicks, clips, hum, and noise, while the higher tiered versions of RX 7 provide significantly more audio repair solutions. Most music producers dealing with controlled environment recordings will be happy with RX 7 Standard, while post-production engineers dealing with problematic field recordings will want to take a look at RX 7 Advanced.
Another audio restoration bundle worth taking a look at is Waves’ Restoration bundle. You may be eligible to save quite a bit of money on Waves’ Restoration bundle if you own already own one of Waves’ other plugin bundles. I believe I was able to get the Waves Restoration bundle for around $49 with upgrade pricing.
1. Remove Clicks
Clicks, pops, and digital impulse noise are usually the result of quality degradation, digital errors, mouth noises, or cell phone interference. When sampling old vinyl records, it’s not uncommon for clicks to appear in your recordings. These types of errors are relatively simple to fix using a de-click plugin.
Some popular de-click plugins include iZotope RX 7’s De-click, Waves’ X-Click, and Sonnox’ Oxford Declicker.
2. Remove Clips
Clipping is a type of waveform distortion that can occur when A/D converters are pushed too hard or magnetic tape is over-saturated. If you push an amplifier to produce a signal beyond its maximum capacity, it will amplify the signal up to its maximum capacity, and no further. The result will look like someone “cut” or “clipped” off the peaks of the waveform with a pair of scissors.
There are many situations in which audio can’t be re-recorded, such as live concerts and interviews. This is when you need to reach for de-clip plugins like iZotope’s RX 7 De-Clip or Accusonus’ ERA De-Clipper.
3. Remove Crackle
Vinyl crackle, dry-mouthed dialogue, and reed noise from wood instruments are all common recording problems. There’s not much to do about vinyl crackle and reed noise at a recording level, but you can prevent dry-mouthed dialogue by making sure your voice talent is well hydrated.
iZotope’s De-crackle, Waves’ X-Crackle, and Sonnox’ Oxford DeClick can all help reduce and remove crackle from your recordings.


4. Remove Hum
Hum is a very common problem in home recording studios, and can be caused by multiple different sources. Some preventative measures you can take include using one outlet for your gear, using balanced cables, isolators, ferrite chokes, and filters. If none of these solutions fix your problem, consider reaching for restoration plugins.
Loopop has an in-depth video explaining how you can prevent hum from occurring in your studio:
At the end of the video, Loopop recommends using either RX 7’s De-hum plugin or Accusonus’ De-Noise plugin; both of which are included in the iZotope and Accusonus bundles mentioned previously in this guide.
5. Remove Reverb
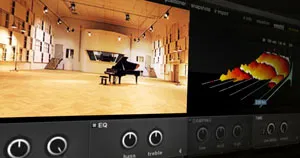
The environment you decide to track in has a huge impact on the sound you record. Recording in a sound treated studio will allow you to capture a “dry” vocal recording that you can add reverb to later on; it’s much easier to add reverb than to take it away, which is why people do this. “Sound treatment” may sound scary and expensive, but it can be relatively affordable to sound treat your home studio.
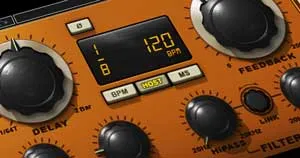
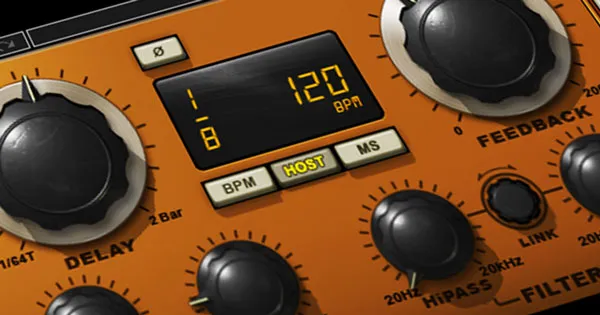
Adding reverb can be done with plugins like FabFilter’s Pro-R, Valhalla Room, or Kush Audio’s Goldplate. Your DAW likely comes with a stock reverb that is good enough to get most jobs done as well. For more information on effectively controlling reverb plugins, check out “The Ultimate Guide to Reverb.”
You can make use of natural reverb by recording in a colorful space. To do this, close-mic the sound source you want to capture and then place a room microphone further away. When mixing, you can adjust the level of the recording captured through the room mic to apply more or less reverb to your mix.
I actually recommend recording all your vocals “dry” in a sound treated studio and then re-amping them in the space that you want to capture the sound of; this provides you with a direct signal free of reverb, along with a reverb recording that you can blend into your mix as necessary.
Lots of audio recordings for film that are recorded on-site, won’t necessarily be captured in sound treated environments. You may be working on a scene in a gymnasium in which the reverb is drowning out the actors.
To remove reverb, you can use a gate like the FabFilter Pro-G, along with a De-reverb plugin. iZotope’s RX 7 De-reverb and Accusonus’ ERA Reverb Remover are both great de-reverb options. Use a gate to reduce the level of reverb tails, and then follow it up with a de-reverb plugin to detach the main content from the reverb still passing through the gate. De-reverb plugins don’t completely eliminate reverb, but they can help rescue otherwise unusable audio recordings.
6. Remove Noise
Noise is almost surely an issue in your recordings if you track audio in an apartment. Possible noise sources include the fan from your computer, your air conditioning, and street noise coming in through your closed windows. To prevent some of this noise, you can purchase sound dampening acoustic foam for your computer chassis, and turn off your A/C when recording.
Unfortunately, there’s not much you can do about outside noise short of soundproofing your studio, which is much different than sound treating your studio. Sound proofing a studio requires you to perform heavy construction, which isn’t something you’ll be allowed to do in an apartment.
De-noise plugins tend to work quite well in general, and function even better if you’re able to capture a noise profile. You can capture a noise profile by analyzing a section of your audio recording in which there is only noise, and nothing else. The de-noise plugin will use this noise profile to remove noise from beneath vocals, instruments, etc.
iZotope’s RX 7 Voice De-noise, Waves’ Z-Noise, and Accusonus ERA Noise Remover all get the job done. If you overdo the effect, you’ll start to dull the main content of your recordings, so be careful not to drive your de-noise plugins too hard.