


Learning how to use and apply parallel processing was a massive game changer for me. The concept of parallel processing is simple: You duplicate a track’s signal and apply processing to the duplicate. This allows you to maintain the integrity of the unaffected dry signal and mix in various amounts of the processed wet signal. By using one return track for multiple channels, you eliminate the need to apply processing to each individual channel.
Let's say you want to apply reverb to 8 channels. Instead of placing a separate reverb on each channel, you would place a single reverb on a return track. Sending various amount of signal from each channel, to the return, will provide you with various amounts of reverb. Return tracks simplify your project, create a congruent space within your song, and save a massive amount of CPU.
Common types of parallel processing include, but are not limited to:
- Parallel Reverb
- Parallel Delay
- Parallel Compression
- Parallel Saturation
- Parallel Stereo Widening
- Parallel Exciting
If you already know how to parallel process, take it a step further with Matthew Weiss as he talks about combining effects for parallel processing.
How to Setup Return Tracks
In Ableton, parallel processing is setup through the use of return tracks. In other DAWs these return tracks are often called aux tracks. We’re going to be setting up a return track that we can use for parallel compression. To create a return track, right click anywhere in the highlighted sends section of the track mixer.

In the pop-up menu, select "Insert Return Track". This will create a new track at the bottom of arrangement view, just above your master channel.
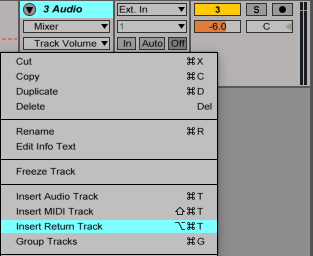
If you can't see this new track, it's because it's hidden. To display all of your return tracks, click on the "R" in the bottom right corner of arrangement view.

How to Setup Parallel Compression
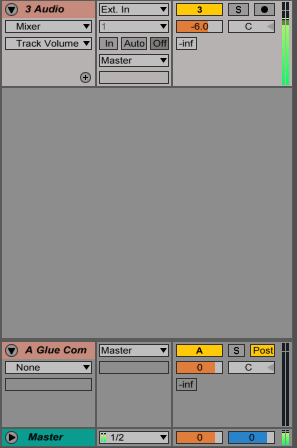
With a return track created and displayed, you can now put audio effects and plug-ins onto it. Since we're setting up this return track for parallel compression, let's drag and drop Ableton's glue compressor onto it.

Import some audio onto your original track (a drum loop will work well for practicing this technique) and initiate playback by pressing spacebar. You'll notice that there's no audio making its way to the return track.
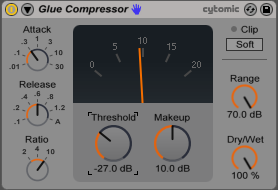
To send audio to the return track, you need to either click and drag upwards on the send (the value that says "-inf") or type your own value into this field. In the image below, you can see that I brought the send's value up to -4dB and that there's now signal making its way out of the return track.
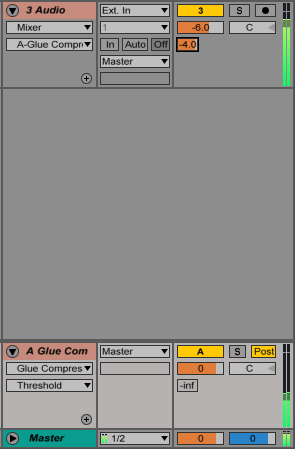
If you've noticed, there's a bit of an issue right now. The glue compressor isn't actually affecting the incoming sound in anyway. This is because its threshold is too high. You can compress with a high ratio (10:1 or more) when using parallel compression.
I usually like to aim for around 10dB of gain reduction (adjust the value to whatever you think sounds good), so I brought my threshold down until the meter was reading 10dB of gain reduction. To compromise for the loss in volume, I boosted the makeup gain 10dB. The attack and release are situational, but for this drum loop I set the attack to .3ms and the release to .6s.
Everything is now setup. We have our original, unaffected track, and our heavily compressed return track. By controlling the volume of the return track, we decide how much of it we want mixed into the original signal. The more of it we add, the thicker our sound will become, but the less dynamic it will become as well.


The goal is to thicken up the original sound, but without adding so much of the return track that it overpowers and kills the original signal's transients.
Parallel Compression Explained
The easiest way to explain parallel compression is with images:
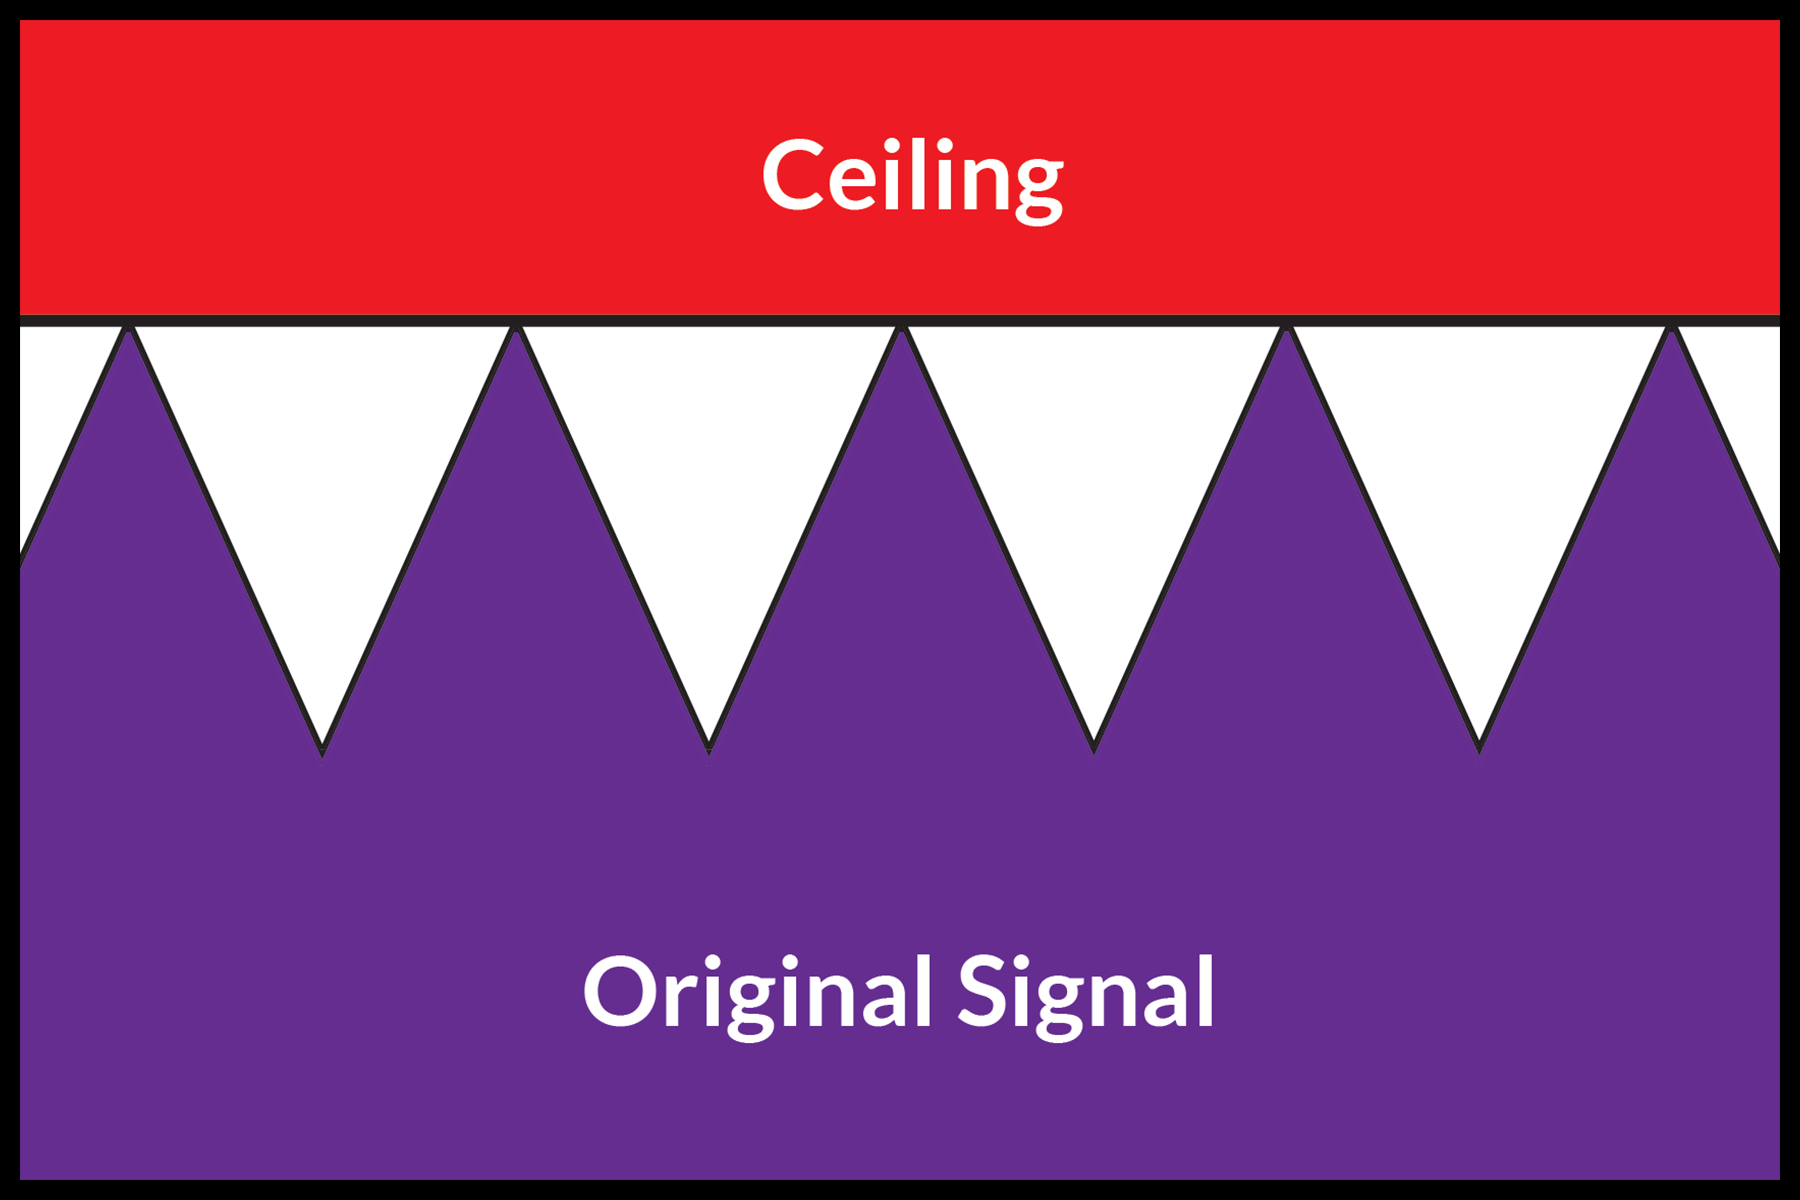
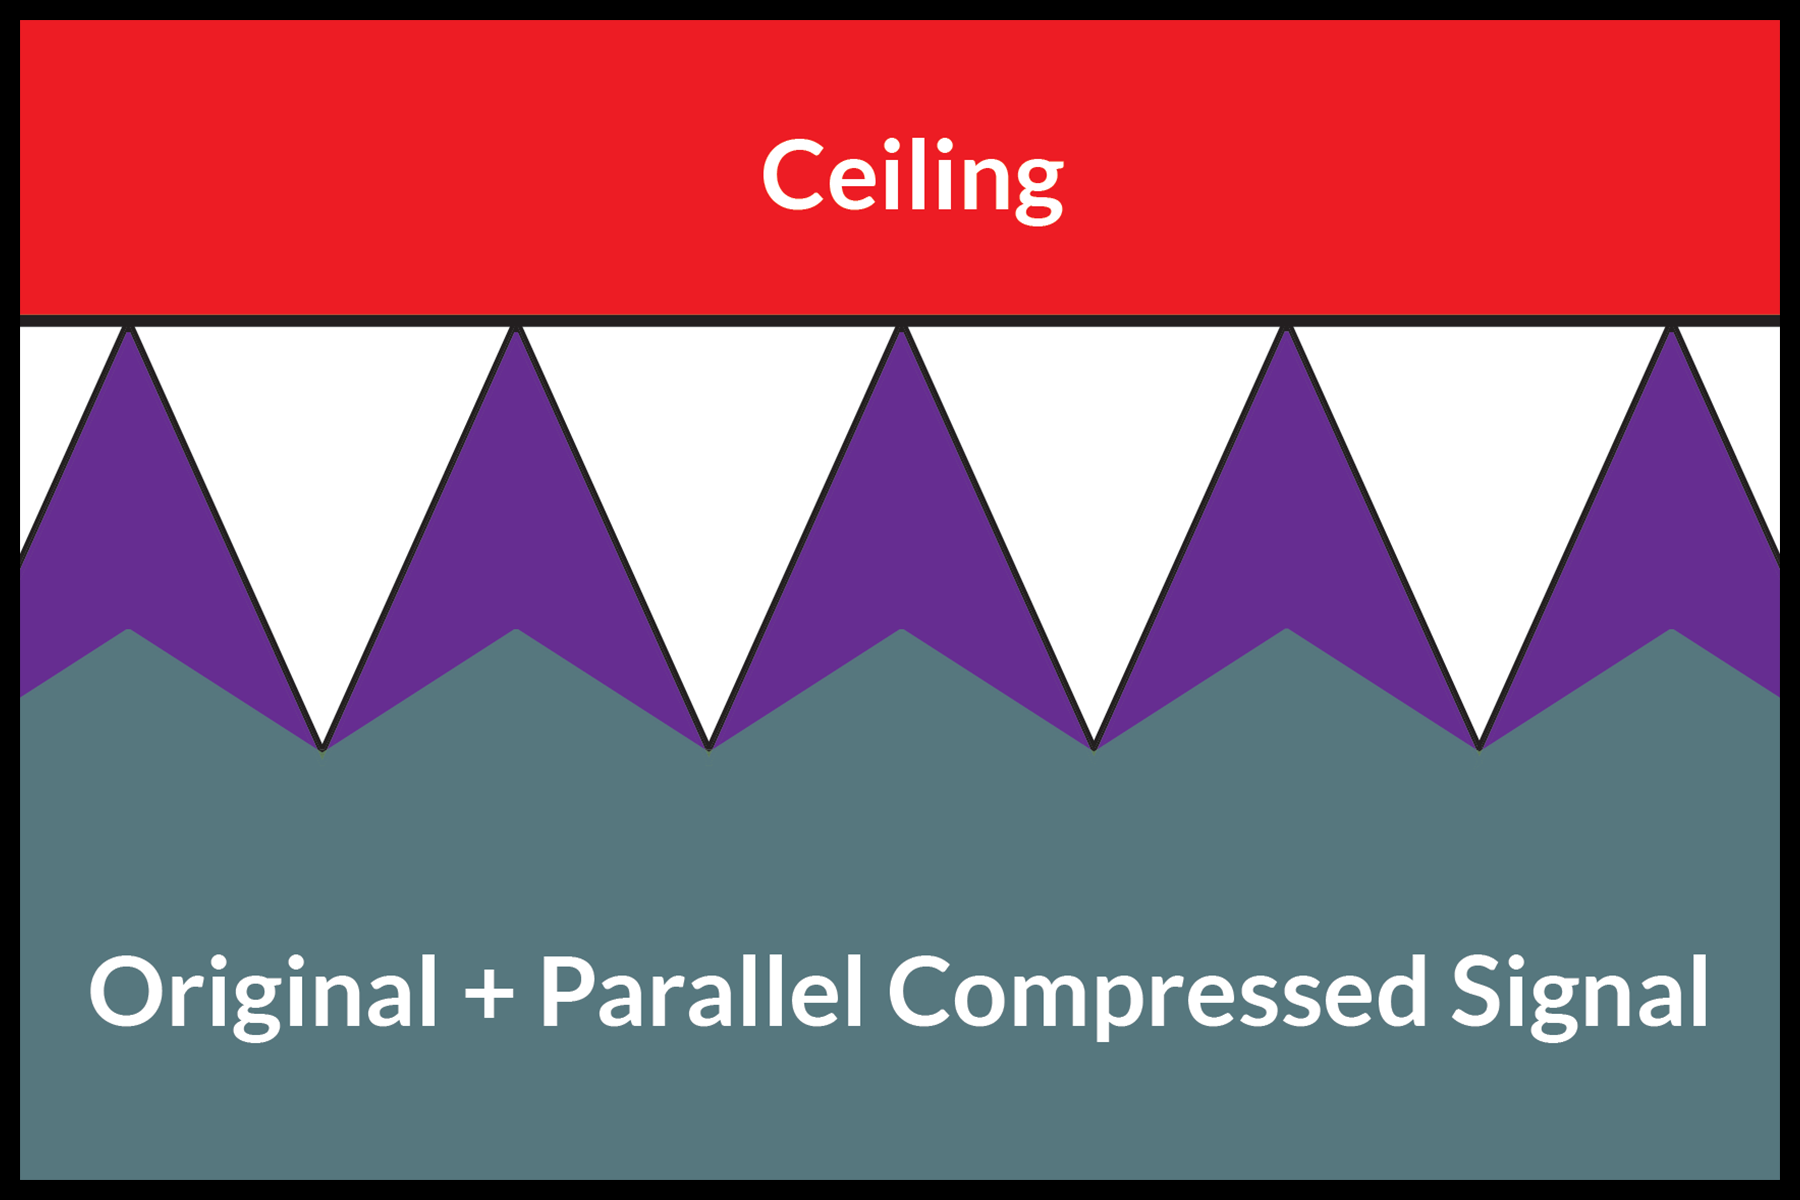
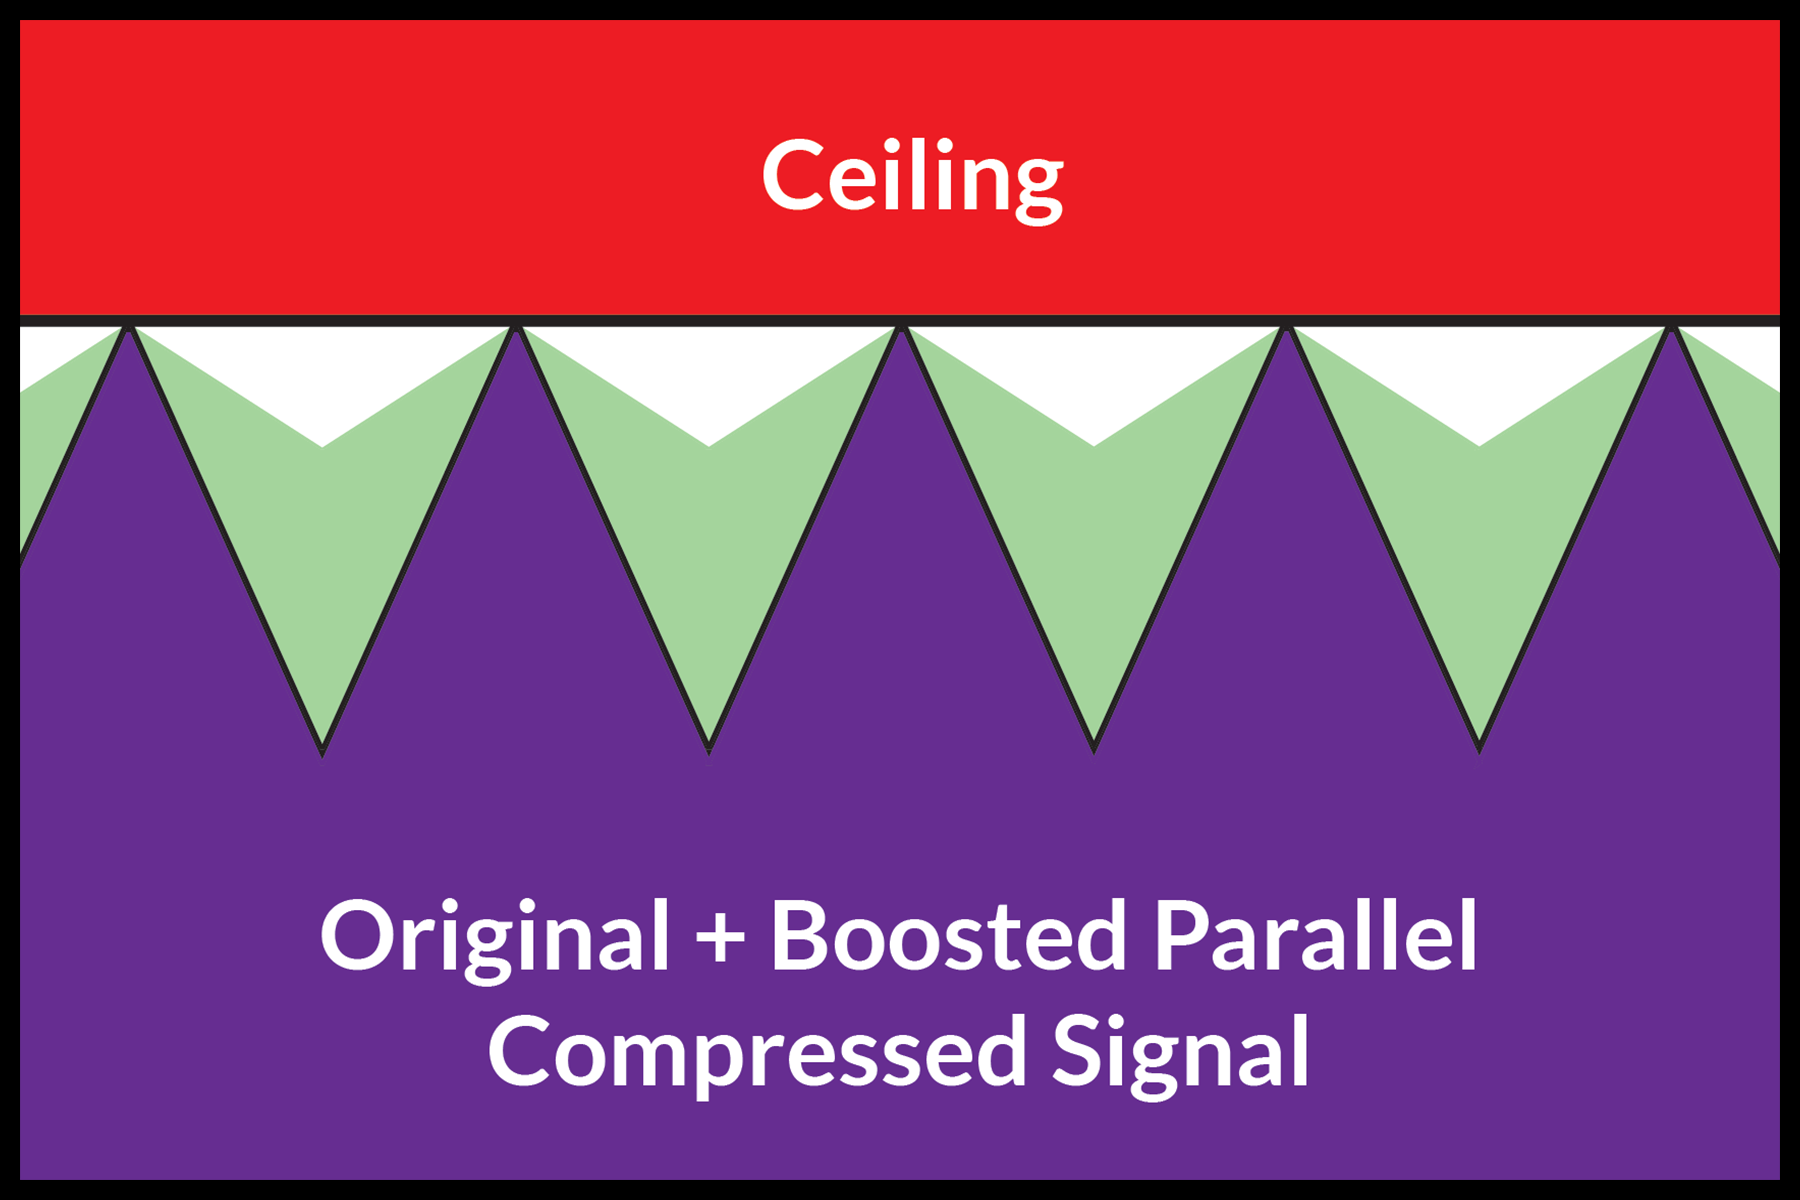
You can fill in the original signal's troughs (dips in audio) by boosting the level of the compressed signal. This increases the perceived loudness of the track and provides a thicker sound. When listening for parallel compression (and compression in general), pay attention to the tail end of transient sounds. Most noticeable on drums, their sustain will be audible for much longer than if they weren't being parallel compressed.
Try experimenting with different types of parallel processing. A very popular method of creating space is using one short reverb on a return track and sending a tiny amount of all your tracks to it. It will make it feel like all your instruments are in the same room. There are an unlimited number of creative possibilities when using parallel processing. If you find something that sounds cool, don't worry if it's "right" or not. You know what you like and that's what's important. Trust yourself and trust your ears!
For a more in-depth look at how to use return tracks in Ableton, check out the following video.
Want to produce radio-quality songs? Check out Black Ghost Audio's Music Production for Beginners video course. Produce three songs from start to finish and learn the skills you need to write, record, mix, and master music at home. No experience required. Click here to learn more and produce your first song in under an hour.


