

Recording a DI electric guitar signal through the Hi-Z input on your audio interface is convenient for a number of reasons. You don’t need to spend money on microphones or hardware amps, and recording in this way is something you can do any time of day because it’s a relatively quiet process so you’re not going to wake up your neighbors.
The only issue with recording like this is that the DI recordings you capture are going to need a little bit of work to sound like something you might hear in a big rock or metal track. I’m going to show you step-by-step how to turn this….
Into something more like this…
We’re definitely not doing rocket science here, but getting the details of each step just right is what’s going to make the difference between a weak and messy guitar arrangement, and a very cohesive and powerful one.
1. Layer You Recordings
Even though the wall of sound you hear in rock songs sounds like one massive guitar, it’s usually multiple different guitar recordings tightly stacked together. Each recording is often run through some different effects and then an amp. In many cases, each recording is run through a different amp—this results in tonal variety, so when these recordings are layered together, they fill up the frequency spectrum and produce a really big and bold sound.
Creating multiple layers is easy enough. In Ableton, you can just duplicate your DI guitar track a few times by clicking on the track and using the keyboard shortcut [CMD][D]. However, you might want to consider pitching one of these recordings up an octave. It’s going to create a little variety and help fill up more of the frequency spectrum.
If you’re using Ableton, double-click on the clip you want to pitch up an octave. Make sure “Warp” mode is engaged, click on Transpose, then hold [Shift] and press the up arrow key on your keyboard. This will transpose the sample up 12 semitones which is equivalent to an octave.
Choosing the right warp mode will prevent weird transposition artifacts from occurring. The default mode is Beats mode, which works well for percussion, but we want to use Complex mode. Complex and Complex Pro mode are both made for complex audio—the difference being that Complex Pro mode provides access to a Formants and Envelope feature that let you dial in the processing a bit more. We don’t need to use those features here so we’ll stick with Complex mode.
2. Add Modulation Effects
We’ve got a bit of a problem since each layer was created using the same DI recording. It doesn’t sound like there are three recordings stacked together. When I solo my top-end guitar and one of the mid-range guitars, it sounds like there are two recordings, but when I add in the other mid-range recording, it just sounds like the previous mid-range guitar got a bit louder.
The reason for this is that there’s no difference between the two recordings living within the same octave. If you were to record multiple DI guitar recordings, there would be natural variations in pitch and time that let your brain pull these different sounds apart. Unfortunately, you don’t always have multiple DI recordings to work with, such as when someone sends you stems.
One option is to record additional DI recordings yourself, but if you’re like me, and not that great at guitar, this might be a bit of an issue—especially if you’re working with a really intricate DI guitar recording. Capturing those additional takes might take you a while, and since there’s an easy workaround, it might not be worth your time.
By applying modulation effects to your recordings, you can introduce pitch and timing differences to your guitars, mimicking the effect produced by layering together unique recordings.
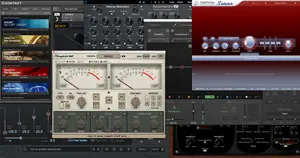
Phasers, flangers, choruses, and tremolos are kind of the bread and butter of guitar pedal modulation effects, and they’re going to deliver the variation I’m looking for. Waves has a plugin called Kaleidoscopes that provides access to all four of these effects, but one of the unique things about this plugin, and the thing that’s really going to help create the illusion that these are different performances stacked together, is the modulator section.
Before diving into that, I just want to quickly explain how this plugin works so that you know what’s going on here. In serial mode, the input signal runs into Effect 1 and then Effect 2, while in parallel mode, your input signal runs through Effect 1 and 2 at the same time. You can select a phaser, flanger, chorus, or tremolo as Effect 1 or 2, and in serial mode, you can quickly swap the effects back and forth.
When using the plugin in serial mode, I want to make sure the Mix knobs are turned up to 100%, and if I were to use this in parallel mode, I would want to make sure the Dry Level knob is turned all the way down. The reason for this is that I only want to hear the processed signal when I begin making changes—doing this is really important because allowing the unaffected signal to pass through Kaleidoscopes, in this case, is going to work against me. I’m trying to make this guitar recording clearly sound different so I don’t want the dry signal passing through as well.
Okay, so back to the modulator section—this is what’s going to let me make my recordings sound really distinct from one another. The modulation shape that you choose controls the shape of modulation applied to the effect you’ve selected. You can choose from a Sine, Triangle, Pure Sine, or Random waveform. You have the option to use the plugin’s input signal as the modulation shape, with the dynamics of the performance affecting the the shape applied, or you can use the plugin’s side chain input signal instead of the input signal.


I’m going to run one of my mid-range guitar recordings through a phaser and chorus in serial. The phaser is using a sine wave modulation shape, and the chorus is using the plugin’s input signal to create a modulation shape—this is going to provide a really dynamic and responsive form of modulation. On its own, this guitar sounds a little off, but that’s the whole point. I don’t want it to sound exactly the same as my other mid-range guitar.
When I solo both guitars, it’s very clear that there are now two sounds layered together.
When setting this up yourself, you don’t necessarily need to use a phaser and chorus. You might want to try running the signal through two flangers in parallel while using different modulation shapes. The whole point is just to add variation to your guitar signal, and Kaleidoscopes lets you do that in tons of different ways, very quickly and very easily.
I’m using Kaleidoscopes moderately here because I still want my layered guitars to feel “tight,” but if you wanted to add really intense creative modulation effects, now would be the time to do it, and Kaleidoscopes is great for that too.
You can tweak the settings in the modulator section to create really apparent modulation…
And the Trigger section down at the bottom of the interface lets you start and stop modulating the effect that corresponds to each trigger. The triggers are activated based on the rhythm or energy of Kaleidoscopes’ input signal or side chain input signal, so the modulation produced is very source-dependent, which results in really unique and lively effects.
3. Amp Your Guitar Recordings
Currently, the tonality of my guitars just isn’t right. Since the guitar signals weren’t recorded through a hardware amp, they don’t have the aggressive and distorted quality that I’m looking for.
Waves has a plugin bundle called PRS SuperModels that models the PRS Archon, PRS Dallas, and PRS Blue Sierra V9—all of which are these boutique amplifiers. I’m going to apply a different one of these amp models to each layer to make it seem like all of my recordings were run through a different amp during the recording process.
The Archon provides an aggressive tone, well-suited for heavier music, while the Dallas is great for producing clean to mild overdrive tones. If you’re trying get a warm and fat tone, you should try using the Blue Sierra V9.
You can actually tweak the settings within each one of these amps quite heavily so you could potentially apply the same amp to each recording, but then modify the cabinet mic placement IRs, play with the boost settings, and mess around with the EQ controls to create some variation between each track.
I’m going to drop the V9 on one of my mid-range recordings for some warmth, Archon on my other mid-range recording for some heavy distortion, and then Dallas on my top-end recording for a little bit of sparkle and shimmer. The presets included in these amps are going to work fine here, but if you want to really customize and dial in the settings, then go for it.
Take a quick listen to each layer before and after one of these amp models has been applied. Pay attention to how much fuller everything sounds with the distortion introduced by the amps, especially when everything plays back together.
4. Add Stereo Width
There’s just one more thing I need to do to get these guitars to sound like a “wall of sound.” I’m going to buss them together and then apply a Doubler effect to the buss to spread the guitars nice and wide.
To buss my guitars together, I’ll select all of my guitar tracks, and then use the keyboard shortcut [CMD][G].
There’s a Doubler preset in Kaleidoscopes so that’s what I’m going to use to create a Doubler effect. When I add the effect to my guitar buss, you’ll hear the stereo image of my guitar buss become extremely wide.
At this point, you can apply a little buss compression using a compressor like Waves’ CLA-76 to glue everything together. Don’t be afraid really slam the signal here because this compressor will actually produce a distortion effect when you drive the input that tends to sound quite nice on electric guitars. I’m using a pretty fast attack and release time, allowing just a little transient material to pass through the compressor so that I don’t suck the life out of my guitars.
Here’s what the guitars sound like within the context of a mix. I’ve added a bass and some drums, and as you’ll notice, there’s plenty of room up the middle of the stereo field where you could place some vocals.