


If you've recorded vocals before, you've likely discovered that a vocal recording sounds much different than the live performance. The two main differences are how plosive sounds and sibilant sounds appear in a recording. Plosives can result from your talent pronouncing B, P, and T sounds, creating large, low-end transients. Sibilance can result from your talent pronouncing S and T sounds, creating large, high-end transients.
Plosives are created by the large amount of air that's pushed out of the talent's mouth all at once. Air flow is stopped by the vocalist's lips, teeth, or tongue, and then released with a huge amount of force. When bursts of air hit your microphone, they cause sharp transients to appear in your recorded audio file.
1. Pop Filters
Before fixing plosives, it's important to reduce the amount of plosives that you record. The easiest way to reduce plosives, at a recording level, is by using a pop filter. Pop filters can be made out of various different porous materials and their main job is to disperse airflow. Your vocalist stands in front of the pop filter and sings through it into the microphone. With less air shooting directly towards your microphone, you greatly reduce the plosives caused by consonants. You can buy a pop filter for around $8.
Setting up a pop filter is easy. The first thing you do is screw it onto your microphone stand. Next, you position the filter so that it's between the vocalist's mouth and the microphone. The pop filter should be about 6 inches away from the mic. If you can place a fist between the mic and the pop filter, it's been positioned at the correct distance.
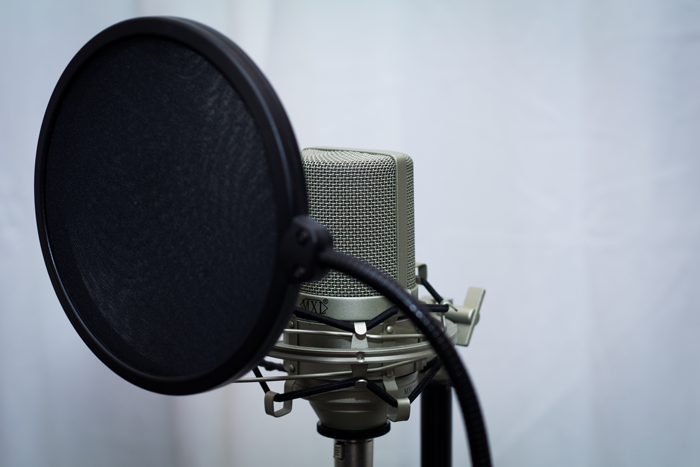
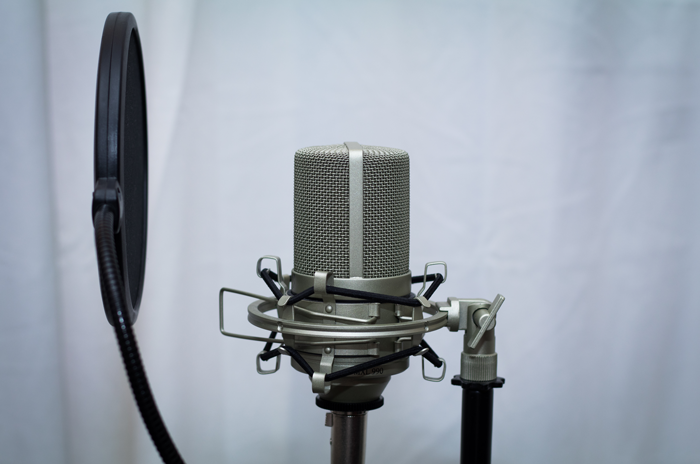
There are also the type of pop filters that go directly on your microphone. The black foam that you've seen on the heads of microphones before are pop filters. If you're using one type of pop filter, you don't need to use the other. When buying a foam pop filter, make sure you get the right one. Some microphones have foam pop filters designed specifically for them.
2. Gain Automation
Once you've recorded your vocals, it's time to start processing them. I recommend automating the gain of your vocal track. When automating gain, there are two goals. The first goal is to is even out the level of the entire vocal track (this will allow you to apply general compression more effectively). The second goal is to reduce any consonants that are still too present in the vocal track. Going through all this trouble will cause less strain on your de-esser and allow it to perform better. It's definitely a time consuming process, but you'll end up with a great product.

3. De-Essers
A de-esser works by compressing frequencies around 8-10kHz. This frequency range is where sibilance hangs out. By reducing transients in this area, you'll be able to effectively deal with sibilance. My favorite de-esser is FabFilter's Pro-DS. It's incredibly transparent and offers a nice range of controls.


De-essers are quite simple to use. You select the frequency range you'd like to affect and then bring down the threshold level. Anything that peaks above the threshold will have its gain reduced. This means that all of the "shhh" and "puh" sounds will no longer stick out like a sore thumb! A de-esser tucks these sounds into the mix and helps them to sound natural.
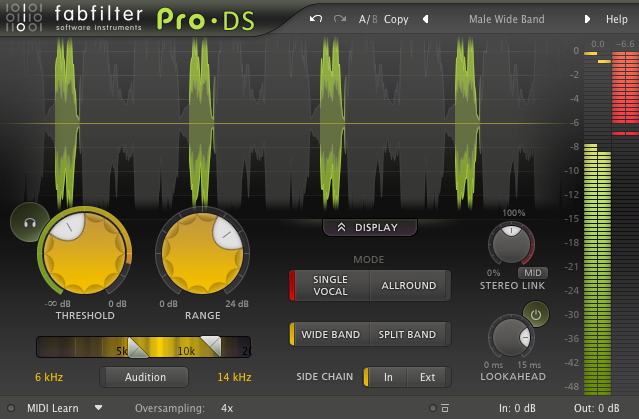
If you're using the Pro-DS, start by reducing the threshold until you see that it's applying gain reduction. Gain reduction is indicated by the red meter on the right side of the de-esser. The sections of waveform, highlighted in green, are the sections receiving gain reduction.
By default, the Pro-DS will only apply a maximum of 6dB of gain reduction. If you'd like the Pro-DS to apply more gain reduction, increase the value of the range knob. To make sure you're only compressing sibilance, toggle the audition button on. You'll be able to hear only the frequencies that are being affected by the de-esser. If you go overboard with gain reduction in this range, it becomes difficult to understand what the vocalist is saying. The idea here is to reduce the harshness of the consonant sounds, but not completely remove them.
How to Make Your Own De-Esser
To make your own de-esser, all you need is a multi-band compressor. Most DAWs come with a stock multi-band compressor. I'm going to be using iZotope Ozone's multi-band compressor to demonstrate.
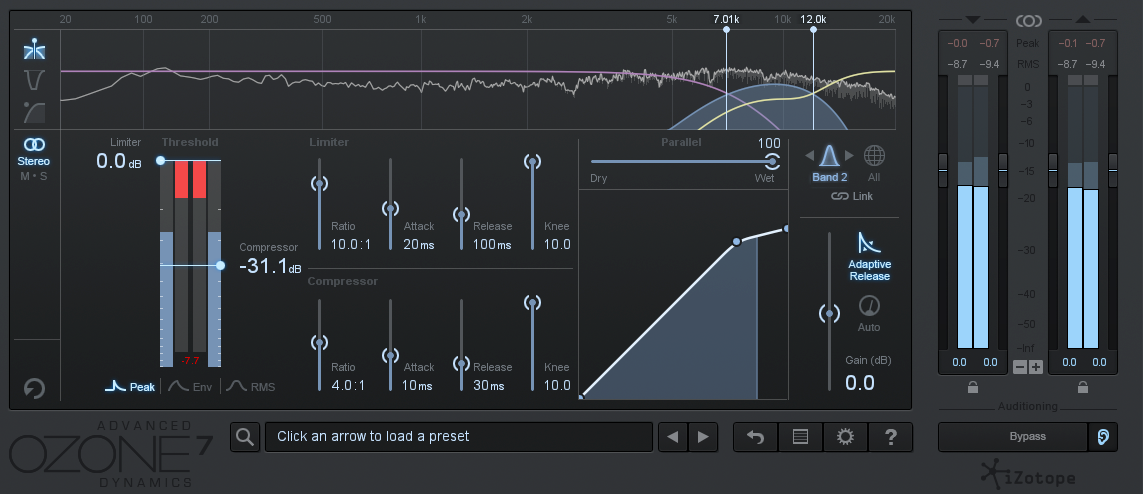
If your multi-band compressor has three bands, you're only going to be using the middle one. The low band and the high band can be turned off, but the middle band is going to be used to compress the sibilant range (8-10kHz). Start with a ratio of 4:1, an attack time of 10 ms and a release time of 30 ms. Slowly bring the threshold down until you hear the sibilant sounds lose their harshness. If the compression sounds unnatural, try increasing the release time slightly.
Moving the crossover points of the bands can be helpful in achieving a natural sound as well. The sibilance in male vocals usually sits a little lower on the frequency spectrum than the sibilance in female vocals. I recommend starting with your low-mid crossover point at 6kHz and your mid-high crossover point at 14kHz. The crossover points that work for the vocals you're processing will vary, but most sibilance sits somewhere within this range. Slowly move the crossover points towards one another until you zone in one the sibilant frequencies. There's a reason I'm not suggesting to set the crossover points at 8kHz and 10kHz; when I do this, I find that the compression becomes too noticeable. Compressing a slightly broader frequency range yields a more natural result.
By using a pop filter, gain automation and a de-esser, it's quite easy to reduce sibilance in your vocal recordings. As with most other things in music production, it seems hard until you know how to do it... and now you do!
If you're look for an all-in-one vocal processing solution, you might be interested in the very affordable dbx 286s hardware channel strip. It's cheaper than certain plugin bundles and it sounds awesome.
Want to produce radio-quality songs? Check out Black Ghost Audio's Music Production for Beginners video course. Produce three songs from start to finish and learn the skills you need to write, record, mix, and master music at home. No experience required. Click here to learn more and produce your first song in under an hour.


