

This guide demonstrates 6 essential drum processing techniques that you can use to blow your client’s expectations out of the water. Learn how to use transient shaping, gated reverb, glue compression, slapback delay, parallel compression, and drum replacement to enhance your musical compositions.
Drums are like a bull in a China shop if they aren’t treated properly; they can destroy your mix. Recording drums presents its own swath of challenges, but there’s a lot you can do to shape and nurture your percussion after the fact. In many situations, you’ll be sent stems from a client and asked to do your best with them. By the end of this guide, you'll have a toolkit of drum mixing techniques that you can rely on to produce results.
1. Transient Shaping
Compressors and transient shapers are both dynamics processing tools, but there are differences between transient shapers and compressors. Compressors are threshold level dependent, whereas transient shapers are threshold level independent. A compressor can be used to shape the curvature of a signal’s transients, but it will only apply this processing consistently if each transient is of the exact same amplitude.
What happens if you’re trying to tame the punch and snap of a dynamic recording, such as the snare track produced by a jazz drummer? This is where transient shapers step in; they make it so that the level at which transients peak is irrelevant. With a transient shaper, you can apply consistent transient processing to a signal, regardless of how dynamic it is.
Another key difference between compressors and transient shapers is how the controls work. The attack knob on a transient shaper dictates how much punch transients have, as opposed to the attack knob on a compressor that tells the compressor how long to wait before applying compression. There’s no sustain knob on compressors, but there is on transient shapers; this parameter allows you to increase or reduce the level of the signal’s sustain.
Smack Attack, which is Waves’ transient shaping tool, contains a number of features not found in other transient shapers. Some of these features include a real-time graphic wave display, zero latency processing, a limiter/clipper that will allow you to drive your drums, and a sensitivity control that lets you apply selective transient processing. There’s also a Wet/Dry knob for parallel processing with having to use an aux track.
Using a transient shaper is simple; you just need to ask yourself if you want your drums to have more punch, or less punch, along with more sustain, or less sustain. By adjusting the Attack and Sustain knobs on Smack Attack, you can quickly modify individual drum tracks, or your entire drum buss. Transient shapers will play nice with your drum buss because they’re threshold level independent, and capable of processing intricate, dynamic signals.
Eventide generously sent me some of their plugins to experiment with recently and Physion (formerly called Fission), which is the first in their line of structural effects plugins, has really stood out to me. It allows you to split the transient and tonal elements of a drum recording, process them separately, and then bring them back together again.
Physion lets you to shape transient material, but also do things like adjust the pitch of a drum’s body, while leaving the transient material unaffected; the result is highly transparent drum pitch shifting. This plugin can be used on sources like guitars and vocals in addition to drums, making it a very versatile tool.
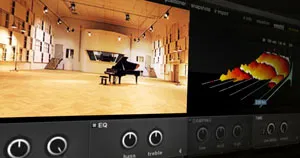
2. Gated Reverb
Gated reverb is used to create percussion that sounds massive, without overwhelming your mix. This drum processing technique involves applying reverb to a recording, like your snare track, cranking up the decay time and the Dry/Wet knob, and then applying a gate to the output signal. The gate attenuates the reverberant signal when its level falls below the gate’s threshold; most often, the gate completely mutes the recording. You end up with a snare that is extremely reverberant, but also controlled.
If you’re going for a 1980s vibe, creating a gated reverb effect is a great place to start. This processing technique became extremely popular in the 80s, and was used on pop, rock, and funk records at the time. Almost 40 years later, you’re still hearing this effect appear on modern songs like “The Louvre” by Lorde. The sound of gated reverb is identifiable by its unnatural “splat.” When applied to a snare drum, it sounds as though the snare wants to take a long time to decay, but is cut off abruptly.
To recreate this sound yourself, I recommend using a lush reverb like the SP2016 Reverb by Eventide, in combination with a gate like the FabFilter Pro-G. For a gated reverb like the one you heard in “The Louvre,” try using a bright, crispy reverb preset. You should place the reverb directly on your snare track, as opposed to an aux track, since it plays such a large role in the formation of the sound. The following audio example contains a dry snare drum, a snare drum with reverb applied, and then a snare drum with reverb and a gate applied to create a gated reverb effect.
The gate you use should have a fast attack time; this will allow the initial signal to pass through relatively unaffected. The gate’s release time depends on how long you want it to take for gain reduction to fully apply once the signal drops below the threshold level. The faster you set the release, the less natural it will sound, and the longer you set the release, the more natural it will sound.
3. Glue Compression
By applying “glue” compression to your drum buss, you’re able to subtly provide your drums with a cohesive sense of space. Glue compression can also result in drums with more punch and clarity. This mixing technique involves attenuating the tail end of grouped transient material.
The Waves SSL G-Master Buss Compressor is one of my all-time favorite buss compressor plugins. It has a naturally bright and snappy character, and is modelled after the master buss compressor found in the SSL 4000 G console. While it’s marketed as a master buss compressor, it works just as well on instrument groups.
SSL bus compressors are known to deliver smaller amounts of compression with faster attack/release times, whereas slower attack/release times apply more gain reduction. In this way, SSL bus compressors are exceptionally musical, which gives them an edge over digital compressors that apply gain reduction in a linear fashion.
When using the SSL G-Master Buss Compressor to perform drum buss glue compression, I typically find myself using an attack time of 10-30 ms to allow transients through, a release time of 0.1-0.3 s to avoid pumping effects, and a ratio of 2:1. You don’t need to apply a lot of gain reduction to hear the effects of this technique, so aim for about 2 dB of gain reduction and assess how the results sound.
The first half of the following audio example is unprocessed, and the second half has glue compression applied. With glue compression applied, the decaying signal of each drum hit is slightly reduced, which results in a tighter, more cohesive sound.
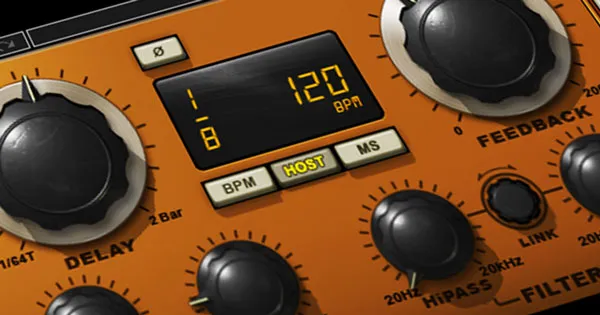
4. Slapback Delay
If you’re trying to achieve a live drum sound, it may be worth your time to experiment with slapback delay. A slapback delay is a delay that occurs briefly after the original signal, usually within 20-30 ms, and it tends to use a feedback amount of 0; this prevents ringing effects from occurring that would otherwise result from the short delay time. Slapback delay plays out as a barely noticeable echo, and can provide your drums with a clear sense of space.
Reverb may push your drums to the back of your mix, but delays do a great job of keeping sounds upfront and present. Hip-hop drums can benefit substantially from slapback delay because this processing technique keeps the drums dry, forward in the mix, and aggressive.
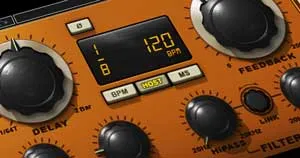
EchoBoy by Soundtoys is a delay that gives you access to all the processing you need to create refined slapback delays. Below, I’ve included an audio clip that first contains an unprocessed snare drum, followed by a stereo slapback delay with a delay time of 34 ms, and then a second slapback delay with a delay time of almost 68 ms. The feedback amount has been set to zero, and the phase of the delayed signal’s left channel has been inverted to create a stereo effect. The delay has also been high-passed at 400 Hz and low-passed at 12.3 kHz; this provides some distinction between the original signal and delayed signal.
In the previous audio example the tempo is set to 110 BPM. At this tempo, 34 ms translates to a 1/64th note, and 68 ms translates to a 1/16th note. I like how this sounds, but if you’re aiming for a more organic vibe, you may want to avoid using delay times that relate to note values.
There’s a wide range of tones you achieve with a slapback delay. By carefully sculpting the delayed signal with filters, you can create dark and ominous vibes by cutting top-end, or bright and cheery vibes by removing low-end.
Slapback delays do a great job of providing liveliness to drums that would otherwise sound dead and sterile. When reverb is too overwhelming, try using a slapback delay.
5. Parallel Compression
Parallel compression can make your drums feel more impactful. This technique involves mixing your original drums with a heavily compressed duplicate drum signal. The compressed signal fills in the troughs of the original signal’s waveform, closing the dynamic range, which results in bigger and thicker drums.
In the following audio example, I’ve used the versatile SSL G-Buss Compressor to perform parallel compression. Half way through, you should notice that the top-end drum elements, like the cymbals and open hats, become more present. I’ve compressed the transients using an extremely fast attack time of 0.1 ms, and a fast release time of 0.3 s. By flattening the transients using a high ratio, I gain access to a sausage-like version of my drums that I can blend in with the original transient signal.
I made sure to level match the before and after signals so you’re only hearing the effects of compression; I recommend you do this whenever you apply parallel compression. People perceive signals that are louder as better. When you duplicate a signal, the overall peak level will increase, so it’s easy to trick yourself into thinking that your parallel compression settings are dialled in properly, when in reality, they’re a mess.
You can optionally apply parallel transient shaping to to your aux track. I find that using a transient shaper like Smack Attack provides faster results in certain situations than a compressor. My recommendation is to use parallel compression when processing a single audio track like a lead vocal, and to use parallel transient shaping when processing transient grouped elements like drums.
Parallel transient shaping has been applied to the following audio example half-way through. You may hear a bit more sustain on the drums, which seems to be easier to milk out of a transient shaper, but I want you to just think of this as a second processing option. You can achieve a similar sustain level using a combination of downwards compression and upwards compression.
6. Drum Replacement
Drums are one of the most difficult instruments to record. The time and energy it takes to mic up a drum kit is exhausting and there’s a lot that can go wrong during the recording process. What happens if you capture a drummer’s performance and realize the snare doesn’t sound good upon playback, or that you should have used a different kick drum? This is where drum replacement software comes in handy.
Toontrack Superior Drummer 3 is an absolute workhorse when it comes to virtual drum kits. It allows you to load drum recordings into its interface and replace your recorded drums with over 230 GB of raw, unprocessed sounds in 44.1 kHz/24 bit. Superior Drummer 3 includes 6 drum kits and additional instruments, which includes 350 vintage and classic drum machine sounds, along with 35 mixer effects.
Another drum replacement option is XLN Audio’s Addictive Trigger plugin. If all you’re looking for is a drum replacement tool, and you don’t need the extensive features that come along with Superior Drummer 3, Addictive trigger is the perfect solution. I’ve been using Addictive Drums 2 by XLN Audio to create realistic drum compositions for years now, and have been very happy with how intuitive XLN's products are.
Whether you want to create larger-than-life drums with gated reverb, produce space with slapback delay, mould the dynamics of your drums with compressors and transient shapers, or replace drums altogether, you now have a solid set of drum processing techniques that you can refer to.
Want to produce radio-quality songs? Check out Black Ghost Audio's Music Production for Beginners video course. Produce three songs from start to finish and learn the skills you need to write, record, mix, and master music at home. No experience required. Click here to learn more and produce your first song in under an hour.