


Finding the right 808 for your song can be tough. Sometimes, no matter how many Splice samples you go through, you can’t seem to find an 808 that fits your track. Luckily, 808s are relatively easy to make using software synths. I’m going to be going over how you can make the perfect 808 for your song using Massive by Native Instruments.
The Roland TR-808 is a drum machine from the 1980s. The samples that came with the unit have become iconic across various genres (especially Hip-Hop).
Once you listen to the drum patterns in the following video, you’ll immediately recognize the 808 kick being used. This kick is what I’m going to be showing you how to recreate using Massive.
Roland has created a compact version of the original TR-808 called the TR-08. If you’re looking to pick up an analog drum machine, I highly recommend it.
I’ll be moving through the sections in Massive as follows:
- Oscillators
- ADSR
- Pitch
- Filters
- Voicing
- Effects
The idea here is to compartmentalize each section of Massive into smaller bite size chunks. Looking at Massive as a whole can be quite daunting, so focusing on one section at a time is key.
IMPORTANT: Before you start to create your 808, make sure you start with a File > New Sound. You need to make sure that you're starting with a clean slate if you're going to follow along with this guide.
1. Oscillators
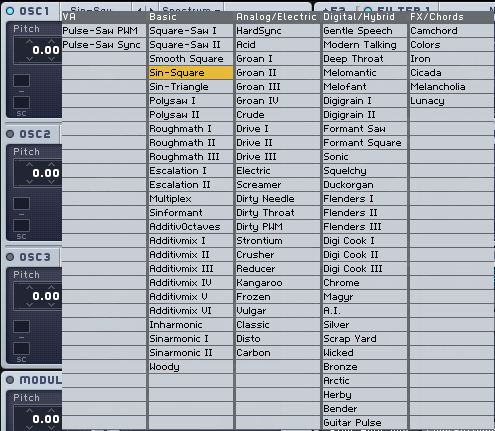
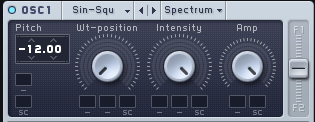
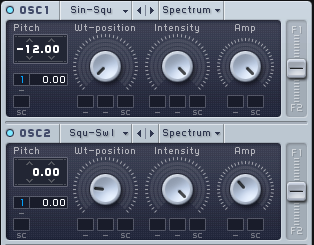
808s are fundamentally made from sine waves, so the first step is to get Oscillator 1 playing a sine wave. Select “Sin-Square” from the drop-down menu at the top of Oscillator 1.
Turn the "Wt-position" knob completely counter-clockwise; this causes Oscillator 1 to play a sine wave. Turning the "Wt-position" knob clockwise morphs the waveform into a square wave, which adds more grunge to the sound but also takes away from the clarity of your low end. Once you've developed the 808 more, it's a good idea to revise the "Wt-position" of Oscillator 1 if you want to beef up the low end.

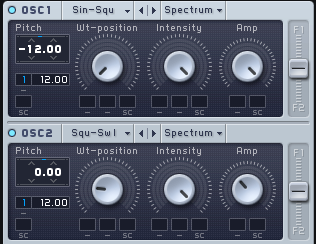
Next, you’ll pitch the oscillator down an octave.
As you playback this patch, you’ll be able to hear that it kind of sounds like an 808, and it has the round, low-end feel, but it’s not very interesting yet. Turn on Oscillator 2 by clicking on the greyed out button in the top left corner. A blue light will turn on to indicate that oscillator two has been engaged.
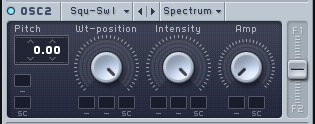
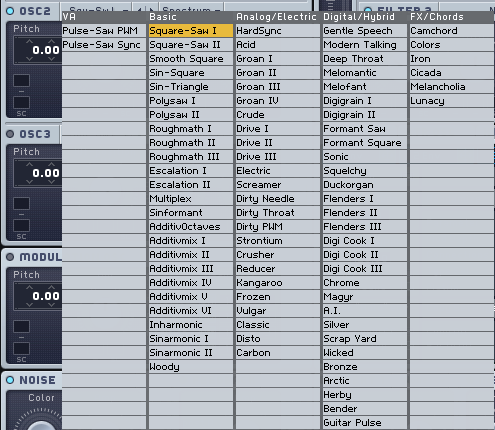
Select "Square-Saw I" from the drop-down menu of Oscillator 2.
Turn up the "Amplitude" knob of oscillator 2 and adjust it until you feel that the grit of the second oscillator is blending nicely with the first one. To change the tone, adjust the "Wt-position" of oscillator two. This will morph the waveform between a square wave and a saw wave.

2. ADSR
Attack, decay, sustain, and release; these parameters control amplitude over time. By manipulating Massive's fourth Envelope, labeled "4 Env", you can control the amplitude of your patch over time. Start by clicking on the tab labeled "4 Env".

In the Envelope 4 section, you're going to want to turn down the "Level" knob, to the right of the "Decay" knob. This will make it so that when your patch finishes attacking (reaches peak amplitude), it will immediately start to return to an amplitude level of -inf (silence). You can control how long this return to silence takes by adjusting the "Decay" knob. This parameter is what's going to shape the body of your 808.
This patch isn't going to play out the 808 in its entirety if you tap a note on your keyboard. I prefer to have it set up like this when producing because it allows me to control how long my 808s play by adjusting the length of MIDI notes.


To use this patch in a live context, you're going to want to increase the release time. This controls how long it takes for the amplitude of the signal to return to -inf once you have "released" the note. Alternatively, you could bounce this 808 to audio when you're finished creating the patch and use it in a sampler.
At this point, you can also increase the attack time of your 808 if you're layering it with another kick. I wrote a guide on 7 Ways to Mix Your Kick and Bass Together that explains this method in detail. If you're not layering your 808 with another kick, give your 808 a short attack time.
3. Pitch
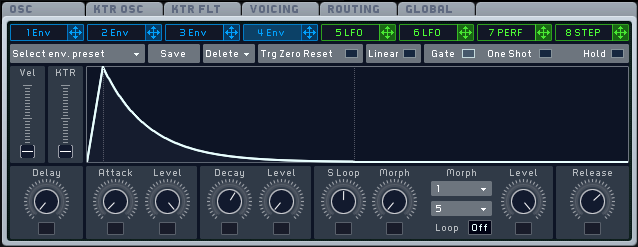
This 808 still needs that quick initial pitch drop that so many 808s have. The way I like to do this is by using a second Envelope (Envelope 1) and applying it to the pitch of Oscillator 1 and 2. To do this, click on the crosshair symbol to the right of "1 Env", then click on the boxes containing the number "1" in the image below. Your boxes won't have the number "1" in them until you've assigned Envelope 1 to them.
Once you've applied the envelope to Oscillator 1 and 2, increase the pitch automation amount by dragging up on the number value adjacent to the envelope you applied; this will cause the pitch to respond to the settings applied to Envelope 1.
4. Filters
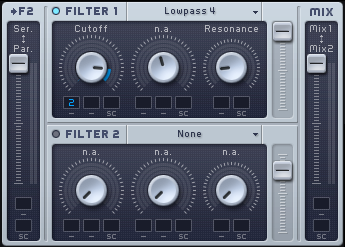
It's up to you to decide if you want to use a filter on your 808. If you use one, it will round out the sound and help control the upper harmonics generated by Oscillator 2. Applying a basic low pass filter works perfectly well for this purpose. However, I like to assign Envelope 2 to the cutoff of my filter; this lets the filter open and close alongside the pitch automation I've already applied.
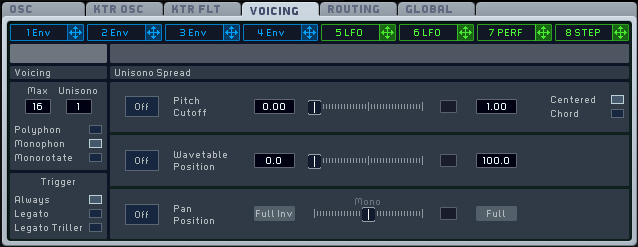
5. Voicing
Massive's voicing section controls how many voices Massive is capable of producing at once. "Unisono" controls how many voices are generated when you play a single note. More than one voice per note is not required for this 808, so you can leave Unisono set to 1.
Make sure that "Monophon" is enabled; this will ensure that only one voice can be played at a time; new notes will cut off previous notes being played.
"Trigger" controls what happens when you trigger a new note over an existing note. Setting this to "Always" will ensure that the 808 retriggers each time a new note is played, regardless of if you're already holding down a note.
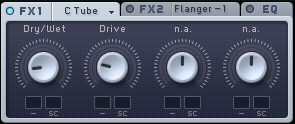
6. Effects
The main effects you'll want to take a look at here are the tube saturation effects found in the drop-down menu of FX1. Classic Tube, Tele Tube, and Brauner Tube all have their sound. So pick whichever one you feel is the most appropriate for you 808. From here, adjust the dry/wet and drive knobs to taste.
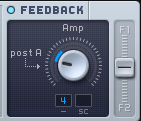
If your 808 is still sounding a little too digital for your liking, Massive has a section called "Feedback." Assigning Envelope 2 to this knob and adjusting the automation level can help take that grainy, digital high end and soften it into that boxy sound you would get from a real kick drum.
The best advice I can give you when making 808s is not to beat your sound to death by over-processing it. An 808 is a predominantly low-end element, so it's ok to keep it simple. Feel free to download the Massive patch I made using the process discussed in this guide. Tweaking this patch is a great way to create entirely new 808s. I've helped set the groundwork for you, and you now have an 808 to pick apart and analyze. Don't be afraid to mangle the patch and see what happens. You can restore the patch at any time, and you can't break Massive, so have fun with it!
If you want to beef up your sample library, make sure to download 808 Destruction for free. This sample pack includes 50 808s that range from warm and round to completely distorted


